Figs, the Easy to Grow Fruit Tree

Before there was Fig Newtons (recently renamed Newtons), there were fresh, dried and candied figs. Unfortunately, most Americans have never eaten a fresh fig and that is unfortunate. Common Fig trees (Ficus carica) have been cultivated for thousands of years are one of the easiest fruit trees to grow whether in a garden or as a container tree.

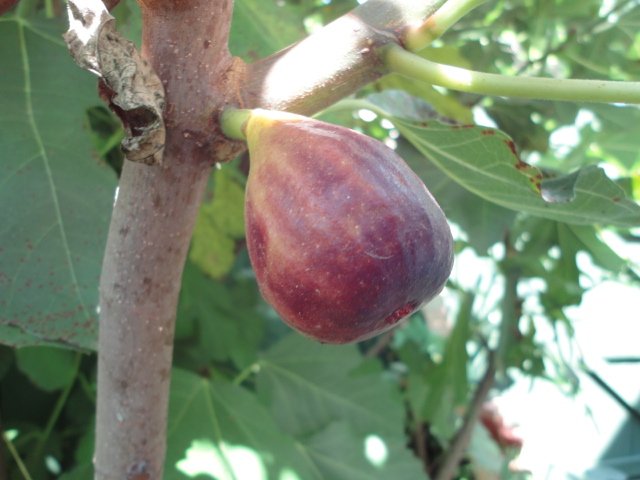
Black Italian Fig Ripening on the tree

Black Italian Fig Ripening

Fresh figs have been described as tasting between a peach and a strawberry. I also believe that there are undertones of vanilla. Regardless of the perceived flavor, to eat a fresh fig straight from the tree is one of those experiences that have you wonder why you never grew a fig tree before.

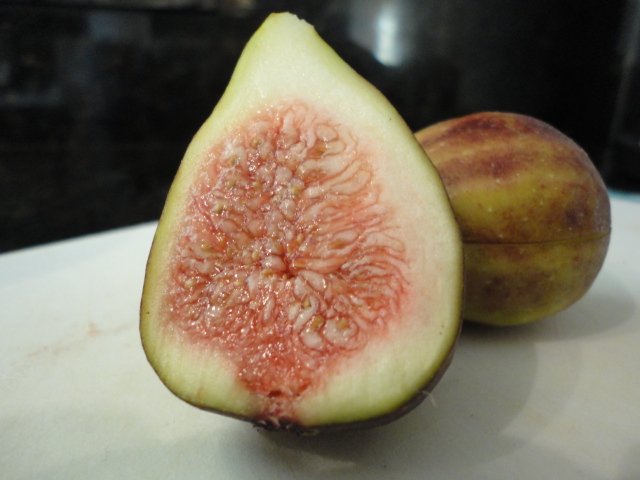
Sliced Ripe Fig

Sliced Ripe Fig

Fig trees whether grown in the yard or in a pot requires very little effort. They prefer soil that drains well and full sunlight. Fig trees are not very demanding in their needs, but being grown soil that is perpetually wet “wet feet” is one sure way to kill your fig tree. Although fig trees grow best in USDA Zones 7-10, where the cold weather is minimal, but there are specific varieties that a gardener can grow a fig tree in USDA Zone 5. This leaves very few states where a fig tree if properly protected in the winter will not survive the winter. Fig trees can be grown successfully in large plastic pot (slightly raised off of the ground if placed in the garden), bearing a good supply of fruit and during the winter stored in the garage when dormant to protect the tree from the harsher elements of the winter weather.

Specifically in eastern Texas (USDA Zones 8 – 9), fig trees are great additions to the garden, providing a fast growing green leafed backdrop to accent a corner or as a center piece for a flower bed. With select pruning, you can easily maintain the height of the tree and provide a visually pleasing trunk and branch structure during the dormant months.

Black Italian Fig Tree

Black Italian Fig Tree with Immature Fruit on Branches

I have found that young fig trees are very forgiving on being moved. In one instance, I moved a fig tree (Italian Black Fig) three times prior to finding a location that was suitable as I was going through annual redesigns of the landscape in the back yard. You can purchase young fig trees from the local garden nurseries, but just as easily propagate by cutting a branch (thickness between a pencil and your thumb) and inserting the cutting into a pot or the ground where you intend to grow the fig. The cutting will successfully root 3 out of 4 times with minimal attention.

Fig Tree in Decoravtive Pot (intentionally being kept minature)

Fig Tree in Decorative Pot (intentionally being kept miniature)

In Houston, TX we are fortunate dependent upon the fig variety to have two crops of figs each year. The first crop of figs will grow produce on the existing growth and the second crop will produce from the new growth once the growing season has begun. With each successive year, the fig trees in my yard produce more and more fruit for me and the birds to enjoy. Yes, ripening figs are the object of attention of the birds (I recently saw a Red Cardinal in the fig tree feasting on a ripening fig). This year if I am lucky to harvest a large enough crop, I will attempt to preserve or candy the fresh figs. If not, then I will be content in picking a ripe fig from the tree and enjoy it while working in the yard.

Cross Section of a Ripe Fig

Sliced Cross Section of a Ripe Fig


Nothing Better Than a Homemade Chicken Pot Pie

I sometimes consider cooking a chicken or turkey not for the first meal, but the homemade pot pie that will be made with the leftover meat. I love homemade chicken pot pie and can think of few meals that I enjoy better.

Chicken Pot Pie on Plate

Homemade Chicken Pot Pie

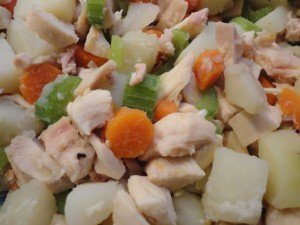
Diced Chicken, Potatoes, Carrots and Celery

Diced Chicken, Potatoes, Carrots and Celery

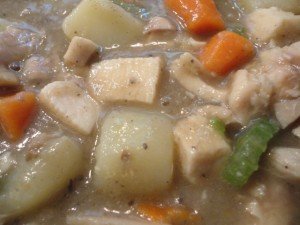
Filling for the Chicken Pot Pie

Homemade Chicken Pot Pie Filling

Pie Pastry Rolled Out for a 9 Inch Deep Pie Dish

Pie Pastry Rolled Out for a 9 Inch Deep Pie Dish

Rolled Out Pie Pastry in a 9 Inch Deep Pie Dish

Rolled Out Pie Pastry in a 9 Inch Deep Pie Dish

Chicken Pot Pie Filling

Chicken Pot Pie Filling Ladled Into Pie Dish

Chicken Pot Pie Waiting to be Baked

Chicken Pot Pie with Egg Wash Waiting to be Baked

Whether you are using leftover chicken from a chicken roasted at home, a store bought rotisserie chicken, leftover turkey from Thanksgiving or even chicken breasts baked in the oven, the results are the same. A pot pie is easy to make, requires little in preparation and is one of those one dish meals that is completely satisfying. In comparison to the alternative, a frozen pot pie from the frozen food section of the grocery store is a pale imitation.

Ingredients:

  • 3 Cups of Diced Leftover Chicken
  • 1 Cup of Diced Boiled Potatoes
  • 1 Cup of Diced Boiled Carrots
  • 1 Cup of Diced Boiled Celery
  • 2 Cups of Gravy (see Giblet Gravy, or if you must a jar of chicken gravy from the grocery store)
  • Salt & Black Pepper to Taste
  • 1 Egg or a ¼ Cup of Milk
  • Pie Pastry (2 Shells per Box, found in the Dairy section of the grocery store)

Instructions:

  1. Dice a cup each of potatoes, celery and carrots (The size of each ingredients will depend on your personal preference. For me, the celery is diced thin and the carrots and potatoes diced to the length of one finger joint).
  2. In a pot of boiling salted water add the diced potatoes, carrots and celery. Boil for about seven minutes.
  3. Remove the pie pastry from the refrigerator.
  4. While the vegetables are boiling, remove the meat from the chicken carcass (using both white and dark meat – personal preference as always) and diced the meat to the desired size. Save the carcass and use to make stock for soup.
  5. Add the diced chicken to a large mixing bowl.
  6. When the vegetables have boiled for about seven minutes, drain off the water and add them to the large bowl.
  7. Pour in the gravy and then carefully mix all of the ingredients. You do not want to break up the potatoes in the event that they are fully cooked.
  8. Add salt and black pepper to taste.
  9. Sprinkle a little flour on the counter top and roll out the bottom pie pastry shell. For reasons beyond my comprehension, pie shells needs to be rolled a little to fit a 9 inch deep dish pie dish.
  10. Placed the rolled out pie shell into the pie dish.
  11. Ladle the pot pie mixture onto the bottom pie shell. It is fine if the mixture is higher than the edge of pie dish.
  12. Repeat the same activity of slightly rolling out the second pie shell.
  13. Place the second rolled out pie shell on top of the pot pie mixture and then fold / roll in the bottom and top pie shells together forming a rolled seal. You can crimp the pie shells together, but why waste the excess shell when crimping?
  14. Cut a few holes into the top pie shell for steam to escape while the pot pie is baking.
  15. Using either and egg wash or milk, brush the top of the pot pie with the egg was or milk to give the pot pie a nice golden appearance when it is finished baking.
  16. Preheat the oven to 400 degrees Fahrenheit.
  17. Once the oven is heated, place the pot pie on the middle rack and bake for 40 minutes. You can prepare the pot pie earlier in the day, but may need an additional 5 minutes to bake if taking it out of the refrigerator and straight to the oven.
  18. Once the pot pie is finished baking, let it stand and cool for 10 minutes.
  19. Slice the pot pie as you would a pie and serve.

Although this recipe is for a Chicken Pot Pie, the same ingredients and steps are used in making a Turkey Pot Pie.

Baked Homemade Chicken Pot Pie

Baked Homemade Chicken Pot Pie


Winning Barbecued Pork Ribs – Low and slow

Coming from the UK my only experience of barbeques is that when you mention the word it rains, and everything has to be burnt to a cinder. We don’t really had the weather to develop a BBQ culture, but every summer we persevere and things are getting better. However coming to the US, has opened my eyes to a completely different style of barbecue. Instead of high heat over coals and the risk of burning the food, it is more common to find low and slow cooking, where the whole process takes hours and creates succulent, fall off the bone, tender meat. Since the barbeque season is pretty much from Memorial Day, through the 4th of July until Labour Day, you get a lot more time to practice the art of barbecuing pork ribs.

A while ago I was invited to a Super Bowl party where there was to be a ‘rib-off’. A ‘rib-off’ is like a ‘cook-off’ but with only pork ribs as the entries into the competition. I think there were about 10 entries and mine came second. Pretty good for a foreigner and my first time cooking ribs. I owe all my success to the Internet. In the past it took years of practice and failures to create the perfect dish, but nowadays with a little research, you can easily learn from the whole world’s experiences.

My ‘secrets’ for the best Barbecued Pork Ribs

  1. The first is that you need to be able to cook the pork ribs low and slow. If you have a BBQ that can maintain 110C (230F) for 4 hours them use that as you will end up with more flavour, however an oven can produce perfectly good ribs, which just fall off the bone.
  2. The second ‘secret’ is to ensure that you remove the membrane from the back of the ribs as it is impermeable and will stop flavours getting to the meat
  3. The third is ‘marinating’ the ribs in beer for a least 2 days before cooking to help maintain the juiciness. My personal preference is Shiner Blonde lager, but I suppose anything will do.
  4. The fourth is adding Chinese 5-spice to my Dry rub, which goes fantastically with pork and adds a hint of the exotic.

Ingredients

  • 1 Rack of Pork Ribs
  • 1 330ml (12 fl oz) Bottle of good tasting lager or beer
  • 2 tbsp melted honey
  • Dry Rub
    • 4 tbsp light brown sugar
    • 1.5 tbsp salt
    • 1 tbsp paprika
    • 0.5 tsp chilli powder
    • 0.25 tsp ground black pepper
    • 0.25 tsp ground cayenne pepper
    • 1 tsp ground onion powder
    • 0.5 tsp ground garlic powder
    • 1 tsp Chinese 5-spice

Method

  1. The first step is to remove the membrane as this will allow flavours to get to the meat. On the back of the ribs, use the tip of a blunt knife to ‘catch’ the edge of the membrane, and then use a paper towel to grab a hold of it and pull. It should come off fairly easily and in one piece. If not you should be able to start where it broke.

    Removing the Membrane from the Pork Rib

    Removing the Membrane from the Pork Rib

  2. Tidy up the ribs, by removing any flaps of meat. If you are using a spare ribs, then square them up by removing the sternum bone, cartilage, and rib tips if present. Depending on the size of your barbecue or cooking dish, you may want to cut the ribs into two halves for easier handling.

    Tidying up the ribs

    Tidying up the ribs

  3. Take half of the dry rub and liberally cover both side of the ribs.

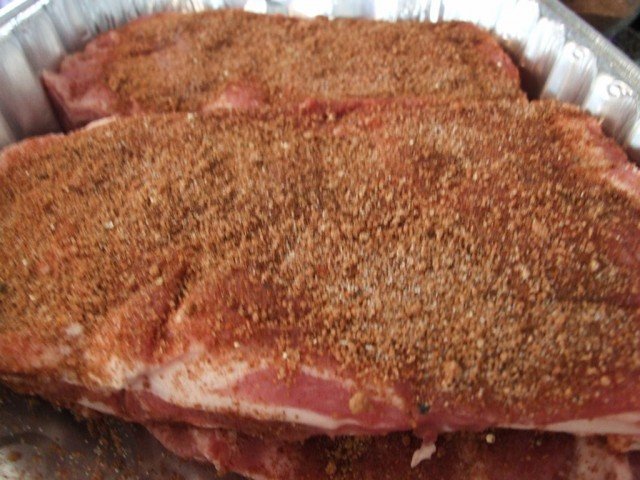
    Porks ribs with dry rub

    Cover both sides of the ribs with dry rub

  4. Lay the ribs, side by side in a glass oven proof dish or metal tray and pour in the beer. Don’t completely cover the ribs in beer as this will wash off the rub, but we will be adding some more later.
  5. Cover the dish and leave to marinate in the fridge for 48hrs
  6. Heat up the BBQ (or oven) to 110C (230F)
  7. Pour off the beer and apply the other half of the dry rub to the both sides of the ribs
  8. Cover the dish with foil and cook in the BBQ (or oven) for 3.5hrs
  9. Brush the honey on both sides of the ribs.
  10. Return to the BBQ (or oven) uncovered for half an hour
  11. Turn up the heat of the BBQ and crisp up the ribs for about 5mins per side or place under a high grill (broiler).

    Low and slow barbeque pork ribs

    Low and slow barbecue pork ribs

Roasting Vegetables, Common Sense is the Key to Perfection

One of great additions to any meal, especially a roasted chicken, turkey or a grilled steak is a medley of roasted vegetables. Roasting the vegetables brings out their natural sweetness and goes well with simply seasoning them with salt and black pepper. There are few constraints on which vegetables are best for roasting except the personal preference of the cook.

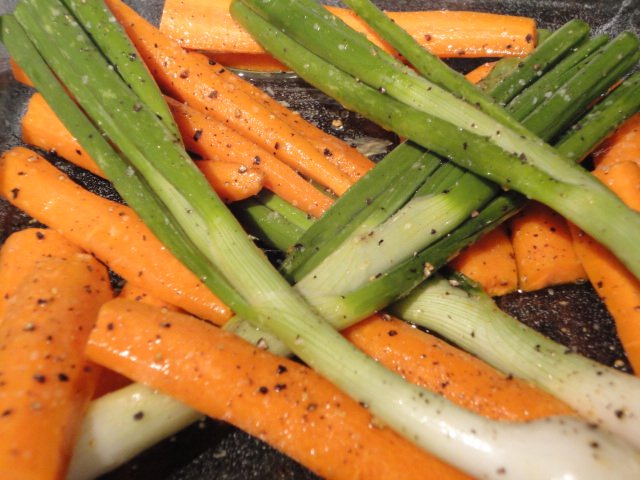
Roasted Carrots and Spring Onions

Oven Roasted Vegetables (Carrots and Spring Onions)

I have had great success in roasting carrots, potatoes, spring onions, shallots, mushrooms, cabbage, cauliflower, broccoli, brussels sprouts, parsnips, celery, bell peppers, poblano peppers and jalapenos. The combination of these vegetables is a varied as the dishes and dependent upon the type of meal I desire to serve. Over the years there have been some spectacular disappointments, most notably the vegetables taking twice as long to cook as planned, the potatoes still being raw or having gone beyond roasting and more like burning the vegetables.

Regardless of the vegetables to be roasted, there are a few guidelines I have learned to minimize the risk of disaster.

  • I have never met a person who did not like vegetables who did not consume more than planned. Roasted vegetables appear to be consumed in greater quantities. Increase your serving size.
  • Leftover roasted vegetables are great for adding to soup stock, diced into a spread for a sandwich / crackers or even eaten cold as a snack.
  • Consistency in the thickness of the vegetables is key to minimizing inconsistency in the vegetables being properly cooked. Nothing more disappointing then the potatoes being closer to raw then roasted.
  • Length of the vegetable is more of a personal choice. Spring Onions look great whole, whereas long thick carrots do well with a length of two inches.
  • Use the appropriate sized baking / roasting dish to cook the vegetables. Vegetables layered on top of one another will not cook evenly.
  • Roasted vegetables are amazing, burnt vegetables tend to be not eaten by guests. It is safe to walk away from the roasting vegetables for the first 20 minutes, but it is smart to check them out at the 20 minute mark and the 25 minutes mark in the event that they are done.
Raw Vegetables Ready to be Roasted

Raw Vegetables Ready to be Roasted

Simple Instructions for Perfectly Roasted Vegetables:

  • Decide which vegetables you want to have with the meal.
  • Slice the vegetables roughly to the same thickness (mushrooms are the one exception and can remain whole). Perfect thickness is no thicker than your finger (half the thickness of the large end of a carrot).
  • Lightly toss the prepared vegetables in Olive or Vegetable Oil and season with Salt and Black Pepper to taste or any other herbs and spices you desire.
  • Preheat oven / toaster oven (perfect size when serving for two) to 400 degrees Fahrenheit (200 degrees Celsius).
  • Bake for 20 to 30 minutes, checking at 20 minutes and 25 minutes to ensure that the vegetables are have not burned. You are seeking a roasted vegetable that is tender, but not mushy, lightly browned and even a little shriveled.


Rich Soda Bread

After making butter the other day with left over cream, I ended up with some buttermilk as part of the process. Being frugal, I had to come up with something to do with it, instead of throwing it out. The first thing that came to mind was soda bread. Growing up in Scotland, we had soda bread in the form of griddle scones, which are slightly leavened triangle farls and nothing beats them straight from the griddle. However they don’t usually contain buttermilk, but Irish soda bread does.

When most people think of soda bread, then tend to think of Irish soda bread. However unless you’ve been to Ireland it is very likely you won’t have tried authentic Irish soda bread as most recipes outside of Ireland contain things other than flour, baking soda, salt, and buttermilk. This recipe for soda bread is far richer than traditional soda breads in that it contains butter, egg and some sugar, to create a richer flavour, but it still tastes of soda bread.

Ingredients

  • 2 cups (475g) plain (all purpose) flour
  • 2 tbsp granulated sugar
  • 0.5 tbsp baking powder
  • 0.5 tsp baking soda
  • 0.25 tsp salt
  • 0.25 cup (60g) butter, softened
  • 0.5 cup (120ml) buttermilk
  • 0.5 egg

Method

Preheat the oven to 375F (190C) and lightly grease a baking sheet. Mix together the flour, sugar, baking soda, baking powder, salt, egg, buttermilk and butter until it forms a stiff dough.

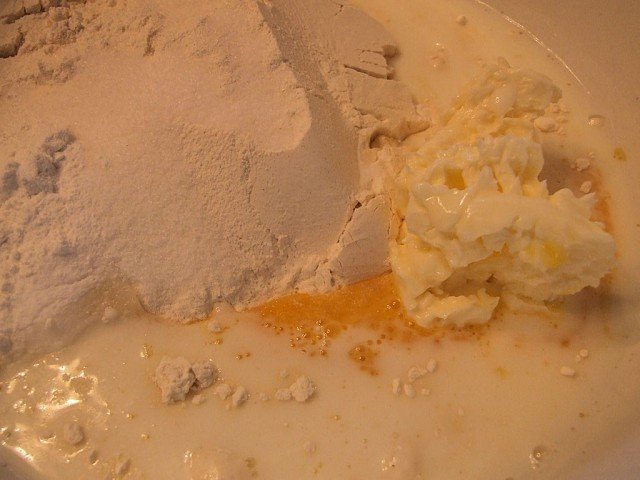
Soda bread ingredients

Soda bread ingredients

Lightly knead the dough. Form the dough into a ball and place onto the baking sheet. Cut a cross into the top of the dough and brush with a little milk and melted butter.

Soda bread dough ready for the oven

Soda bread dough ready for the oven

Bake in the oven for 45mins, until a knife inserted into it comes out clean.

Enjoyed best hot with butter.

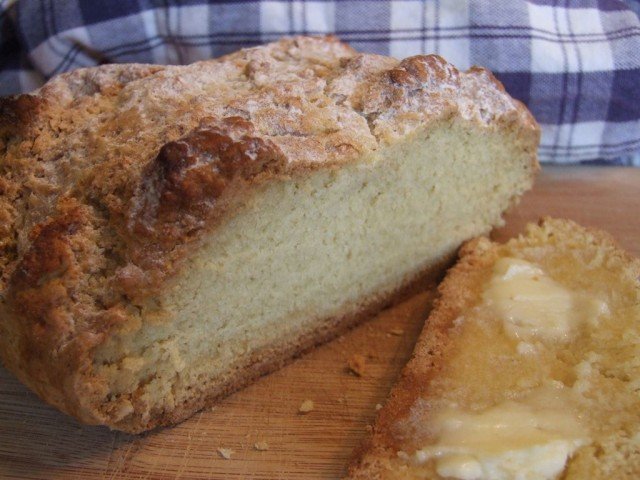
Soda bread and home-made butter

Soda bread and home-made butter