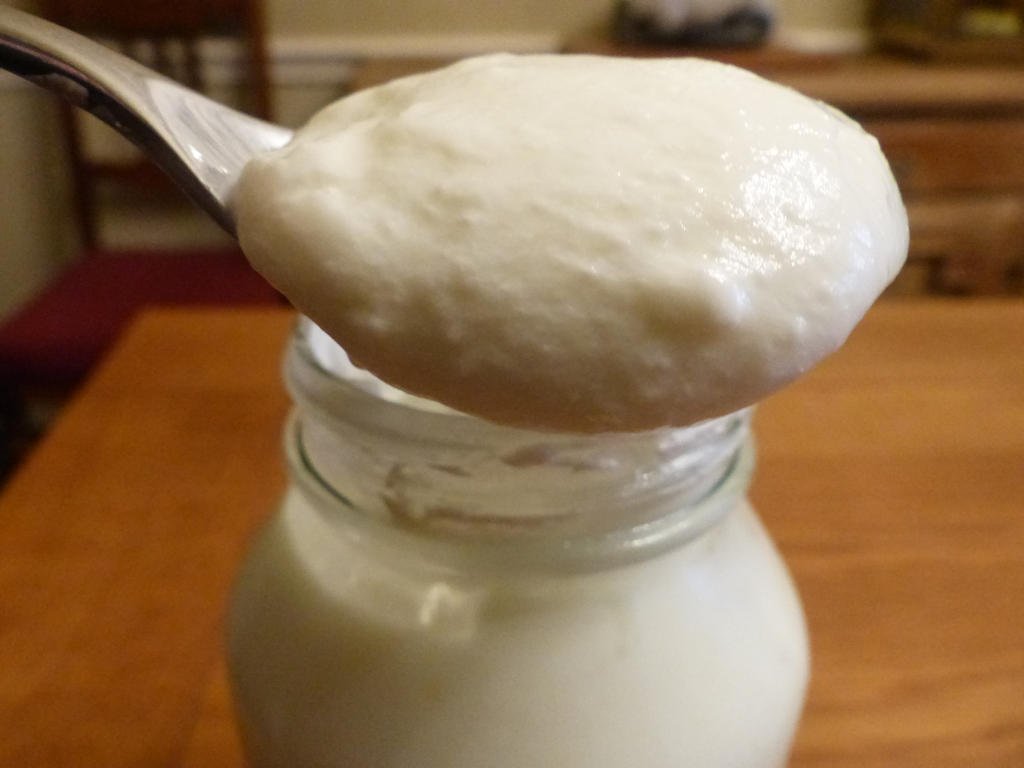
Making Yogurt at Home is Really Easy

The process of making yogurt at home is not so much a recipe as it is a very simple process and some waiting. I’ve been making a large jar of homemade yoghurt every week, or yogurt as you Americans call it, for about 2 years now, long before the pandemic. I think I saw a video online from Priya Krishna about making homemade yoghurt and never realized how simple it was. All that is needed is two ingredients, fresh whole milk and some good plain yogurt. The cool thing is you only need to buy yogurt once and you use a little of your own as a yogurt starter for the future. Not only does making yoghurt at home save lots of money, you will know exactly what is in it going forward.

Making Yogurt at Home

Since the pandemic, lots of people are looking for distractions as well saving money or being more health conscious, hence the craze in making sourdough bread at home. In some ways making yoghurt is similar in that you use a starter to ferment and create something that is not only delicious, it has potential health benefits as well as the huge number of recipes you can use it in such as tzatziki, curry, or spooned over fresh fruit. I had seen an uptick in people making their instant pot yogurt, which is a simple way to do it, but the method I use is fairly simple too and the only special piece of equipment is a Thermos or Vacuum Insulated Flask or bottle.

A quick note on milk

Though it is possible to make yogurt from other types of milk, including vegan nut milks or low fat milks, I haven’t experimented with them and only use fresh organic whole cows milk. Honestly having a little full fat milk in your diet isn’t all that bad and the full fat whole milk is so creamy and delicious you will really be missing out. The milk I use is pasteurized & homogenized because that’s all I can buy easily, but I have use low pasteurized, un-homogenzied before and the end result is exactly the same. Since you will be saving money by making your own yoghurt, buy the best quality milk that you can find easily.

The science of yogurt

Though the process of making yogurt is simple, what goes on while waiting for it to be ready is really interesting. The word Yogurt comes from the Turkish root word ‘yog’ meaning to condense, which is what happens when the milk curdles because of the bacteria. The bacteria in yoghurt are actually a culture of Lactobacillus delbrueckii subsp. bulgaricus and Streptococcus thermophilus bacteria which when introduced to lactose in the milk, act upon it fermenting the sugar into lactic acid which in turn coagulates the proteins in the milk and produces the distinctive tang.

Overview of making yogurt

The milk is gently heated to just under the boiling temperature. This serves two purposes. One to kill any unwanted bacteria in the milk and two to denature that proteins in the milk to heat the coagulation of the yogurt. The milk is the cooled to roughly 113F to 116F (45C to 46.5C) before adding some pre-made yogurt. It is then kept warm for a few hours before it is decanted into jars and then stored in the fridge.

Some tips to make the best homemade yogurt

• For you yogurt starter find a friend who makes their own yogurt and ask for some of theirs, or buy some good quality whole milk yogurt at the store. Just make sure that it doesn’t have any other ingredients in it and it contains ‘live active cultures’
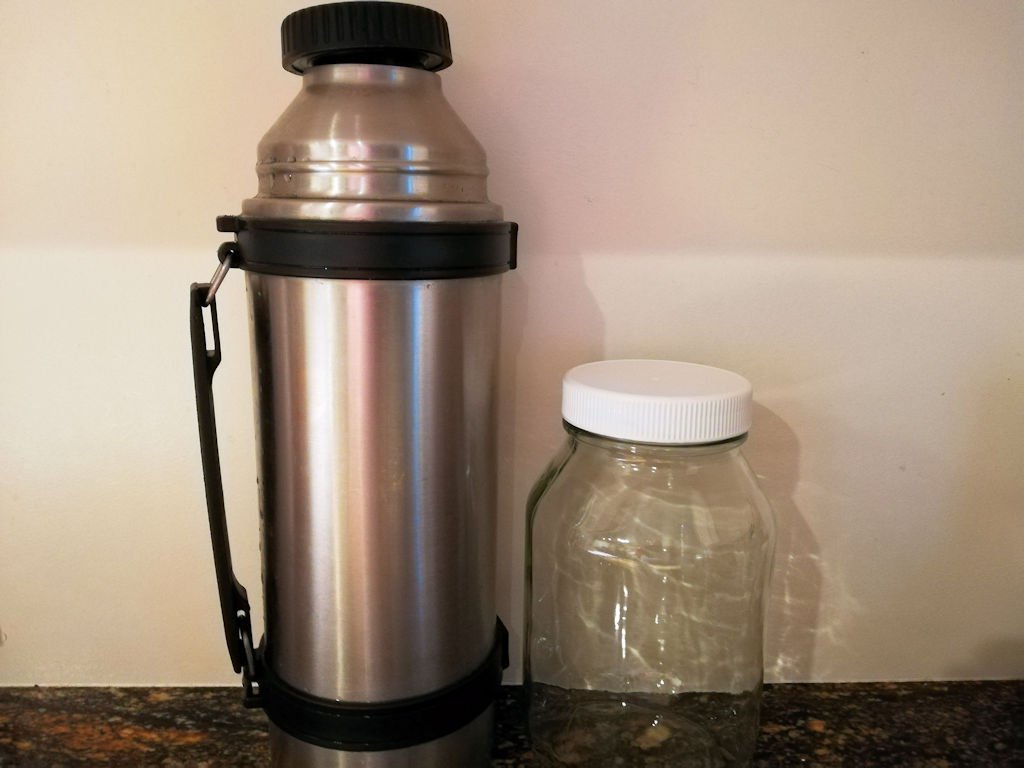
• To make the whole process simpler try and find a jar or jars that are the same volume as your vacuum flask. My flask is roughly 32 fl oz (950ml) and so are the jars I use. This makes the measuring of the milk very easy. I just fill the flask with fresh milk and then pour it into the pot. Simple and less washing up. The recipe below is based on my flask and jars, so amend according to your equipment.
• While heating the milk, be careful not to scrape the bottom of the pan, as some of the milk may have scalded or scorched and you don’t want to release it because you’ll end up with brown, burnt bits of milk in your finished yogurt.
• If you don’t have a thermometer, you can guess the temperatures. Heat the milk to the point before it boils. It should be steamy and foamy, but not bubbling. To roughly find the cooling temperature before adding your yogurt, try sticking a clean finger in it and hold it there for about 10 seconds without it becoming uncomfortable.
• To cool the milk you can either allow to do it naturally (probably about half an hour) or the method I use, is to prepare a bowl, larger than the cooking pot, half fill it with cold water and ice. Put the pan in the cold water bath and monitor the temperature while it cools.
• Once the yoghurt is ready to pour into jars, you may need to stir it using the handle of a long spoon to help it come out of the flask. Also a large canning funnel helps with the pouring of the yoghurt into the jars.
• The fermentation of the yogurt in the vacuum flask needs a minimum of 4 hours, but I find leaving it for 12 hours is easier and gives the right amount of tang. I either start the process about 9am so it is ready to decant into jars at 9pm before bed, or I start the process at 9pm, so that it is ready to decant in the morning.
• Your homemade yogurt should easily keep in the refrigerator for 2 weeks. Just remember to keep a little as the starter for your next batch.
• If your yoghurt is not setting after it has be made, check your temperatures during the process. Also sometimes I’ve noticed that if I change the brand of milk, it takes a couple of times before the started becomes happy with the new milk. The worst case scenario would be that your starter has become exhausted. The simple answer is to buy some new yogurt and start again.
• Have all you equipment and ingredients ready and laid out. Mise en place!

Vacuum Insulated Flask for making yogurt

Vacuum Insulated Flask and Jar for making yoghurt

Making Yogurt at Home

Ingredients

• 32 fl oz (950ml) of Fresh Whole Milk
• 4 tbsp of pre-made Yogurt

Equipment you will need

• Thermos or Vacuum Insulated Flask
• Jars
• Mixing Spoon
• Thermometer
• Pot
• Bowl
• Funnel

Method

  1. Measure your milk. The easiest way is to use your vacuum flask.
  2. Fill the flask with hot water and seal it with its lid.
  3.  Pour the milk into a pot and gently heat it over a medium heat.
  4.  Stir gently during the warming.
  5. Once the milk reaches between 180F (82C) & 190F (88C), adjust the heat and hold the warmed milk at this temperature for about 5 mins, gently stirring.
  6. Pour out the hot water from the flask.
  7. Remove the milk from the pan and allow it to cool to between 113F to 116F (45C to 46.5C)
  8. Add the pre-made yoghurt and stir into the cooled milk to ensure that it is thoroughly dissolved.
  9. Using a funnel, pour the milk/yoghurt mixture into the flask and seal it with its lid.
  10. Leave the flask for about 12 hours (at least 4 hours)
  11. Pour the yoghurt into clean jars, seal and put into the fridge to cool.
  12. Enjoy for the next two weeks and remember to keep some yogurt for making your next batch.

Delicious Aubergine Curry (Vegetarian Indian Eggplant Curry)

The most common aubergine curry is probably Baingan Bharta, which is a dish from the Punjab region of India and Pakistan were the aubergine (eggplant) is minced before cooking. I had bought some small Indian eggplants the other day at the grocery store and wanted to make a dish that kept them more whole and did a bit of research before settling on making a Kerala inspired Indian eggplant curry.

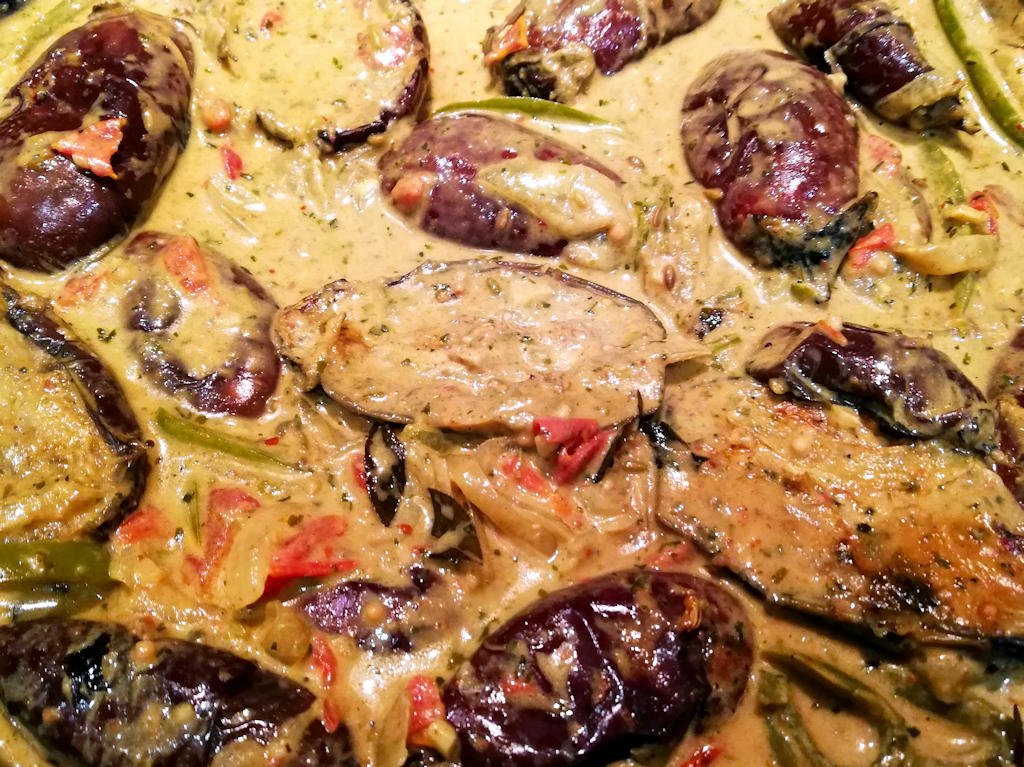
Eggplant curry

Kerala Aubergine Curry

Aubergines come from the Solanaceae family that includes nightshade and are believed to have originated in India before being domesticated and where they still grow wild today. Indian eggplants, sometimes called ‘baby aubergines’ are smaller than the more usual Italian aubergines and have a sweeter, mild flavour with a creamy texture when cooked. Not to be confused with Thai eggplants which are roughly the same size, but are green and white and don’t have the same sweetness.

Indian aubergines

Indian eggplants

The word aubergine is commonly used in Europe and is derived from the Arabic word baḏinjan which in turn came from the India. Even in India today eggplants go by many names including baingan, brinjal and in the Kerala language Malayalam, they are called valutana. The word eggplant used primarily in the USA is because of their shape when small resembling an egg.

Kerala has been a major producer of spices such as ginger, cardamom and cinnamon for thousands of years and in the cuisine they are commonly used as well as curry leaves, mustard seeds, chilies and turmeric. Coconuts are another abundant crop in Kerala and is frequently used in the dishes. These ingredients are the inspiration for this amazing aubergine curry. It is very mild and creamy, even with the addition of hot chilies, as well as being rich with spices.

Kerala Aubergine Curry Recipe Ingredients (Serves 4)

  • 8 to 10 Indian eggplants cut in half lengthwise or 2 medium Italian eggplant chopped into large chunks
  • 1 medium finely chopped onion
  • 250ml of full fat, unsweetend coconut milk (~1 cup)
  • 2 cloves of crushed garlic
  • 1 tsp of crushed ginger
  • 3 to 4 green chilies such as jalapeno. (Remove the ribs and seeds if you wish)
  • 0.5 tsp of hot chili powder (optional)
  • 1 tsp fennel seeds
  • 0.5 tsp of mustard seeds
  • 1 tsp ground turmeric
  • 1 tbsp ground coriander
  • 1 tbsp of dried kasuri methi leaves (fenugreek)
  • 1 large tomato, finely chopped
  • 3 or 4 curry leaves
  • The crushed seeds from about 5 or 6 green cardamom pods
  • 1 stick of cinnamon
  • Coriander (cilantro) leaves for decoration
  • Vegetable oil
  • 1 tsp of salt
Pan Roasting Indian aubergines

Pan Roasting Indian Eggplants

Indian eggplant curry recipe method

  1. First roast the eggplants. Either pan roast then in plenty of vegetable oil or in a 200C (400F) oven covered in vegetable oil until the flash side is golden brown and the flesh is soft but not mushy. Remove the eggplant from the pan.
  2. Add about 2 tbsp of vegetable oil (and optionally a tbsp of ghee) to the pan and gently saute the onions until they begin to turn light brown.
  3. Add the mustard seeds, fennel seeds, curry leaves, cinnamon, coriander, turmeric, garlic and ginger to the oil and temper them for about a minute until they are fragrant.
  4. Add the tomatoes and chilies and cook for about a minute.
  5. Re add the cooked eggplant with about 125ml (half a cup) of water. Bring to the boil and cook until the eggplant is fully soft.
  6. Add the coconut milk and fenugreek leaves and heat until just simmering. Discard the cinnamon stick.
  7. Serve over basmati rice and sprinkle with fresh coriander leaves.
Indian eggplant curry

Indian Eggplant Curry

What is Blood Sausage & What is it Made of

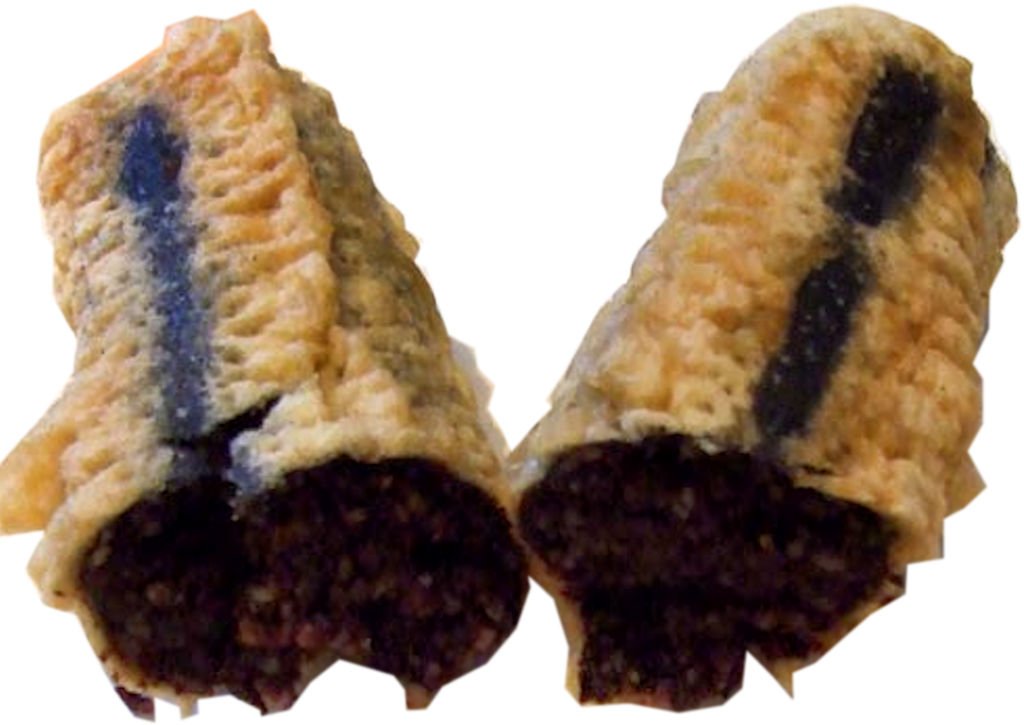
The question ‘What is Blood Sausage’ is quite literally answered within the question. It is a sausage made from animal blood and other ingredients such as spices, fats, and grains. It is commonly stuffed into a large animal sausage casing, and then boiled. It is then commonly fried before eating, usually in slices and is common in many countries around the world, though it is becoming less popular.

What is Blood Sausage

What is Blood Sausage

What is Blood Sausage Made of

The primary ingredient that blood sausage is made of is animal blood. Most commonly it is pigs blood, but depending on the country that it comes from it can also be made from cow, yak, goat, sheep, duck, and even chicken.

What else is Blood Sausage Made Out of

The ingredients of blood sausage vary from country to country, but as well as blood, there are bulking agents such as fats, nuts, bread, vegetables, flours, meat scraps and grains such as barley, oatmeal, rice. Other ingredients are usually their to enhance the flavor such as onions, raisins, dried fruits, garlic, sugar, and herbs and spices such as black pepper, chile pepper, allspice, thyme, cumin, cinnamon, ginger and salt.

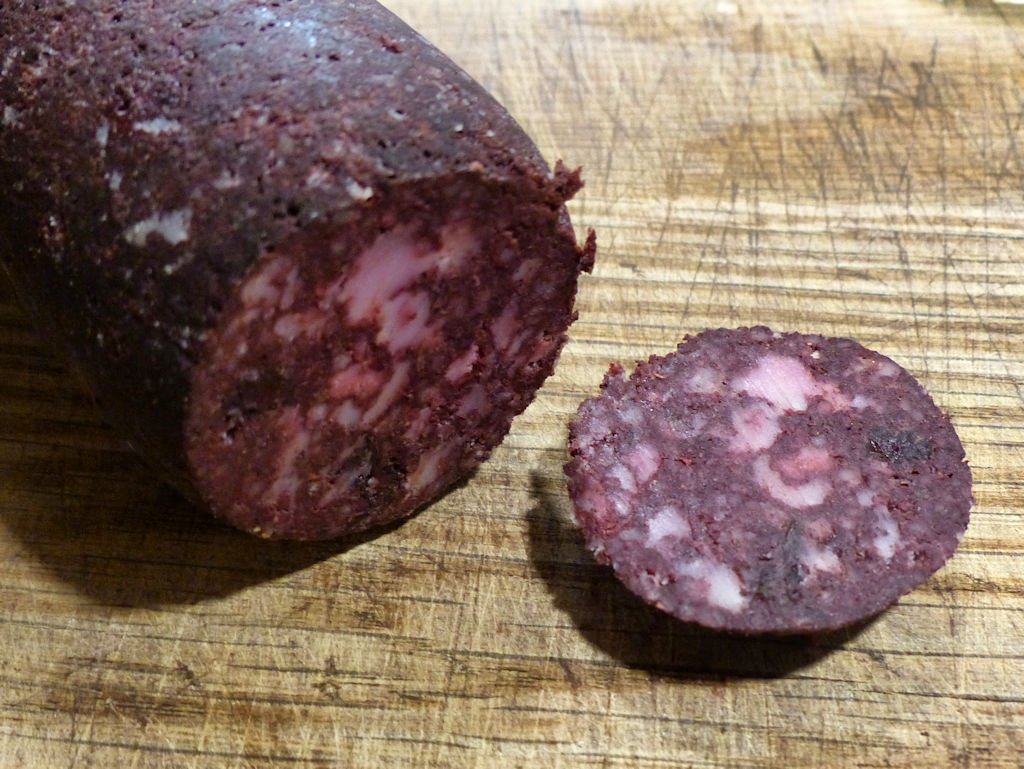
Uncooked Blood Sausage

Uncooked Blood Sausage

What is Black Pudding

Black Pudding or black sausage is the name for blood sausage in England, Scotland, Ireland and other parts of the Commonwealth, with the name ‘Pudding’ commonly used to describe types of sausage, probably derived from an Anglicised pronunciation of the French word boudin, meaning sausage.

Blood Sausage throughout the ages

Though blood has been used in many countries around the world in various dishes, it was more common for the blood to be turned into sausages since it was the first product from a slaughtered animal as it’s throat was cut, it was easier to store for longer if it was immediately mixed with the other ingredients, stuffed into sausage casings before it quickly deteriorated and congealed. The first mention of blood sausage in literature was in Homer’s Odyssey around 800 B.C. where he wrote

As when a man besides a great fire has filled a sausage with fat and blood and turns it this way and that and is very eager to get it quickly roasted.

In today’s sanitized world of food, especially in the Western World it is less common than years ago and a rather large majority of people will never had heard of blood sausage, let alone tasted it, even though most countries have their own version of it. In the past most cultures that each meat, used every part of the animal, including the blood, which when added with other ingredients such as grains, spices, and fat, produced a tasty and nutritious food. Today rather than used as a food stuff, it is more common to find it used as a feed ingredient for livestock and pets as well as a fertilizer.

Examples for blood sausage around the world

In other countries the name for blood sausage in their own language usually translate literally to blood sausage for example blodpølse (Denmark and Norway), blodkorv (Sweden), blutwurst (Germany), bloedworst (Netherlands), verivorst (Estonia), chouriço de sangue (Portugal), boudin noir (France), and longganisang dugo (Philipines)

United Kingdom
Known as black pudding, it is made from pigs blood, oats, barley, suet, onion, allspice, mixed spice, salt and pepper. It is commonly sliced, fried and eaten at breakfast, with scallops as an appetizer, or battered and deep fried and served with chips (fries) as take out. One of the popular black puddings in the UK, comes from the Stornoway on the Scottish island of  Lewis. It also has been granted Protected Geographical Indicator of Origin (PGI) status.

British Battered Black Pudding

British Battered Black Pudding

Latin America
Known as Morcilla (other spelling include morcela), it can be usually found to be bulked with rice and eaten with barbecues, fried during the holidays or eaten in sandwiches. In Colombia it can be found with ingredients such as peas, rice, cilantro (coriander), and in Uruguay, sweet versions contain, pine nuts, chocolate, orange peels and raisins.

Morcilla

Morcilla

Denmark
Known as blodpølse it is only usually found just before Christmas and contains cinnamon, raisins, brown sugar and rye flour. It is fried and served with syrup, apples and more cinnamon.

Danish Blodpølse fried with Apples

Danish Blodpølse fried with Apples

France
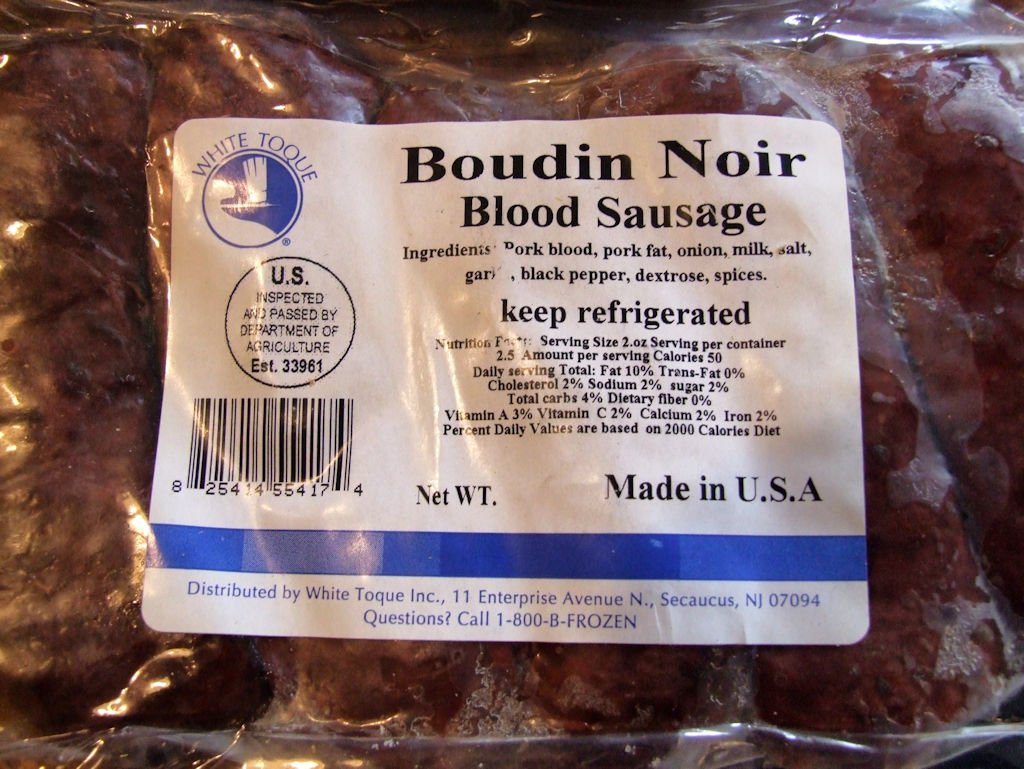
Known as boudin noir, common ingredients include apples, potatoes, and cream. The French Foreign Legion’s anthem, Le Boudin, is named after this type of blood sausage.

Boudin Noir

Boudin Noir

Poland
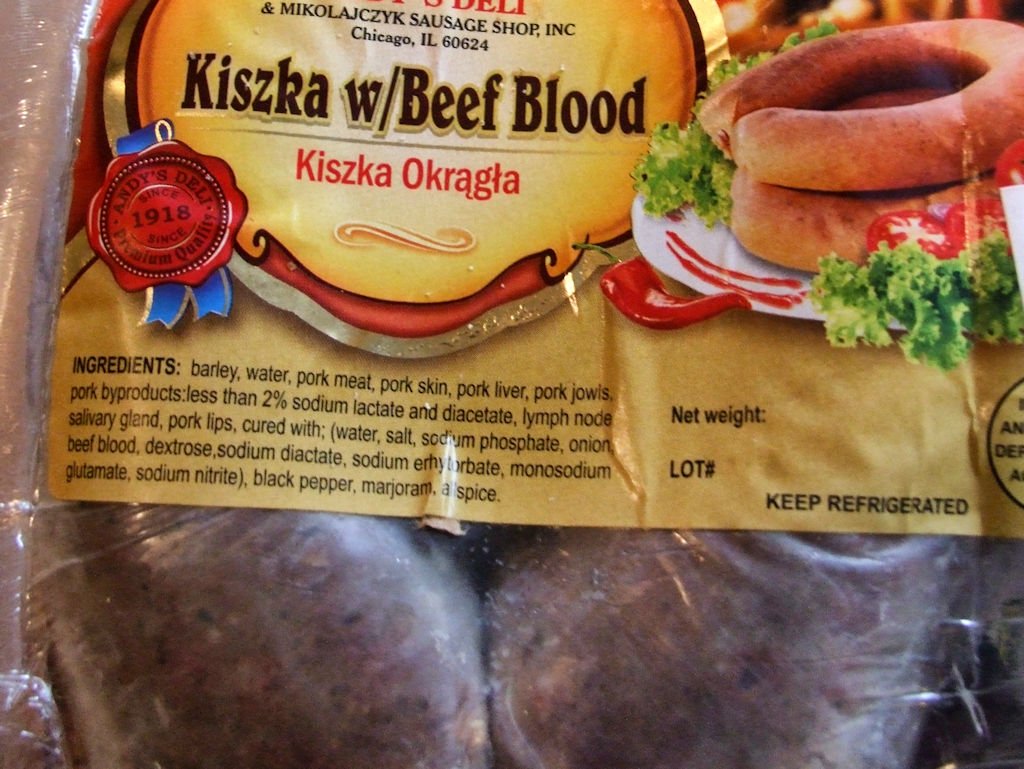
Known as Kiska, it is commonly made from beef blood. It can easily be found in Polish Delis in the US and tastes very similar to UK black pudding for any UK expats that need a taste of home.

Polish Kiska Blood Sausage

Polish Kiska Blood Sausage

Sweden
Known as Blodpudding and contains milk, beer, treacle and rye flour.

Swedish Blodpudding

Swedish Blodpudding

What does blood sausage taste like

It depends on what is in the blood sausage, but generally it is has a savoury taste, slightly sweet, meaty with a subtle metallic aftertaste. Overall it is delicious, not matter what people’s first impression of eating blood may be. Go on and try it, you’ll be pleasantly surprised and want to taste it again. Look at these kids and how much they enjoy it, even after finding out what it is.

Vegetarian Black Pudding

Vegetarian Black Pudding

And finally the biggest oxymoron ever, is that the Real Lancashire Black Pudding Company has made a Vegan and vegetarian blood sausage. What?

Chicken Jalfrezi – A curry from Leftovers

A firm favourite in British Indian Restaurants is the Chicken Jalfrezi. It is so popular that a few years ago according to a poll run by Chaat, the British Curry Club magazine, Jalfrezi now seems to challenge Chicken Tikka Masla as the new king of curries.  Tastes are changing with people now wanting more flavour from their curry and are moving towards spicier dishes.

Chicken Jalfrezi

Chicken Jalfrezi

The name Jalfrezi comes from the Bengali phrase jhāl porhezī meaning ‘spicy (or hot) diet’, but can sometimes be written as jaffrazi or zalfraizi.  As with the variations in the name, there isn’t so much as an authentic or an agreed upon chicken jalfrezi recipe, since the origins of the dish grew out of the habit of trying to use up leftovers during the time of the British Raj in India. According to Lizzie Collingham in her book ‘Curry: A Tale of Cooks and Conquerors’, the virtuous housewife, transformed thrift into a mark of respectability and found ways of using up cold meat in curries usually fried with onions and chillies, though it more likely that her Bengali Muslim servants developed the dish according to her instructions of not wasting left over roasted meat because eating leftover food was taboo for Hindus.

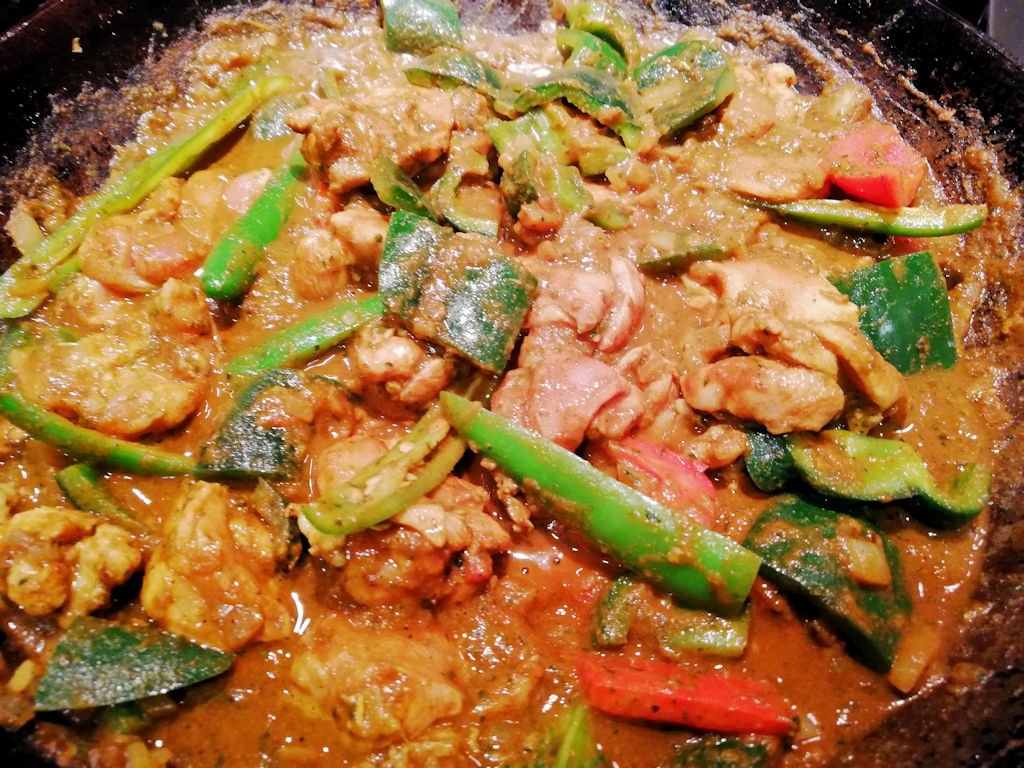
Jalfrezi cooking

Jalfrezi cooking

Over many years trying to recreate a British Indian Restaurant (BIR) version of Chicken Jalfrezi, I tried many recipes from such people like The Hairy Bikers, Madhur Jaffrey, Sanjeev Kapoor and even Jamie Oliver there was always something not quite right. As with most dishes in UK Indian restaurants and takeaways, the depth of flavour of BIR curries comes from the base gravy sauce, a pre-made spiced onion sauce that is the basis for most of the curries that helps the chefs turn out tasty, flavourful curries quickly and efficiently. Though there  isn’t a recognised official version of jalfrezi most dishes in the UK are stir-fried fried onions, capsicum (bell peppers), tomatoes and chillies in a thick, medium spicy aromatic sauce.

Chicken Jalfrezi Recipe

  • 4 Boneless, Skinless Chicken Thighs (or 3 breasts)
  • 1 large Onion, chopped
  • 2 peppers red and green, chopped
  • 2 chilli peppers, whole or chopped
  • 1 tbsp of fresh Ginger purée
  • 1 tbsp of Garlic purée
  • 1 tbsp of Chilli Powder
  • 1 tsp of Ground Turmeric
  • 1 tbsp of Ground Coriander
  • 1 tbsp of Ground Cumin
  • 1 tbsp of Garam Masala
  • 1 tbsp of dried Fenugreek (Kasuri Methi) leaves
  • 2 tbsp of Tomato purée
  • 3 tbsp of vegetable oil
  • 500ml (1 pint) of BIR base gravy
  • 1 tsp of salt
Jalfrezi Ingredients

Jalfrezi Ingredients

Directions

  1. First in a large skillet quickly fry the chicken and onions in a little oil (or ghee) over medium heat for about 8mins, turning to evenly brown on all sides.
  2. Temporarily remove the chicken and add the spices, ginger and garlic to the skillet with a little more oil to bloom for about 1min until they are fragrant.
  3. Add the chillies, peppers and the chicken to the pan, and then add the BIR curry base and the tomato puree. Cook for about 15mins
  4. Season with salt to taste.
  5. Serve over rice and / or naan bread.

Chicken Jalfrezzi may have started a a thrifty use of leftovers, but has risen to one of the most ubiquitous curries in the UK and seems to be very popular in Pakistan too. From restaurants to takeaways and even ready meals from supermarkets Jalfrezi is a firm favourite and comes in many other forms, not just chicken, but beef, pork, seafood and even vegetarian versions such as paneer or chickpea. Though my recreation of a British Indian Restaurant Chicken Jalfrezi doesn’t stick to the original intention of using leftover cooked meat, it is as close to the restaurant dish as possible in flavour.


Easy BIR Chicken Korma with Coconut Milk

Chicken Korma with Coconut Milk is my attempt at making a UK Indian restaurant style korma that is rich, creamy and mildly spiced as well as quick and easy to make. Chicken Korma is an extremely popular dish in UK Indian restaurants that it tops the polls of Britain’s favourite curry, sometimes beating Chicken Tikka Masala.

The dish of Chicken Korma served in UK Indian restaurant looks nothing like the dish found in India, as can be seen from the picture below. Korma originates from the Mughlai cuisines of the Indian subcontinent and it’s name come from the Urdu word qormā, meaning braised. Originally the dish was cooked with various spices such as coriander, cumin and mixed with yoghurt. Though korma is thought of as a mild curry dish in the West today, it traditionally it could range from mild to spicy hot.

Authentic Indian Chicken Korma

Authentic Indian Chicken Korma

Like most curries served in British Indian Restaurants (BIR), Chicked Korma is a dish that has evolved separately from the original dishes found in India and are a result of adapting dishes to Western tastes and simplifying the cooking of dishes in restaurant kitchens to be quick and simple to produce.

My recipe for BIR Chicken Korma is slightly  different than most found in restaurants, in that it uses coconut milk instead of yoghurt or cream and uses chicken thighs instead of the more common chicken breast. I think these changes result in a far richer, creamier and tasty curry with the addition of dried fenugreek towards the end of cooking adding a slight sweet, nutty, curry flavour that enhances the dish with a more complex flavour not found in some blander tasting kormas.

Chicken Korma Recipe Coconut Milk

Chicken Korma Recipe Coconut Milk

Chicken Korma Ingredients

  • 4 Chicken Thighs – boneless and skinless
  • 150ml (5 fl oz) unsweetened coconut milk
  • 150ml (5fl oz) of BIR curry base
  • 2 tsp of ghee or vegetable oil
  • 1 tbsp fresh ginger puree
  • 1 tbsp garlic puree
  • 1 tbsp ground turmeric
  • 6 crushed cardamom pods
  • 1 tbsp dried fenugreek leaves (kasuri methi)
  • 1 tsp of lemon juice
  • 0.5 tsp of salt

To serve handful of cilantro (fresh coriander), chopped cashews, almonds or desiccated coconut

Chicken Korma Spices

Chicken Korma Spices

Method

  1. Add the ghee or vegetable oil to a skillet over a medium heat.
  2. Add the chopped chicken to the oil and cook until just coloured
  3. Add the ginger and garlic puree to the pan with the ground turmeric and cardamom pods.
  4. Cook the spices for a minute or so, then add the BIR curry base and the coconut milk
  5. Gently cook the chicken mixture for 12 mins until the chicken is just cooked
  6. Add the dried fenugreek leaves, lemon juice and salt.
  7. Serve over boiled basmati rice and top with a selection of cilantro (fresh coriander), chopped cashews, almonds or desiccated coconut.
Chicken Korma with Coconut Milk

Chicken Korma with Coconut Milk