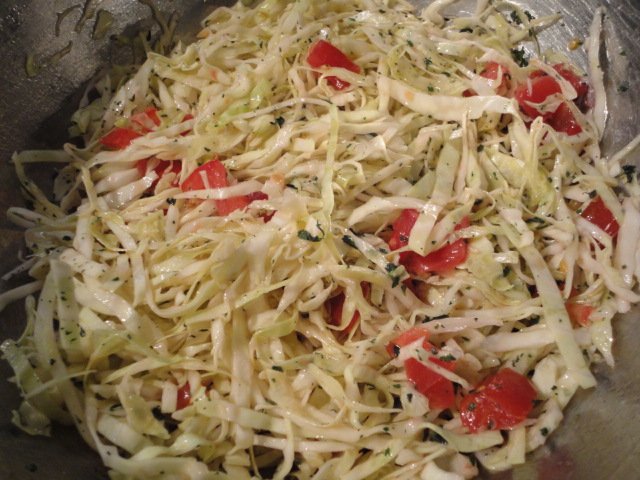
Lebanese Style Cole Slaw

Cole Slaw is as much a part of American summer food dishes as hot dogs,hamburgers, potato salad, barbeque, ice cream and watermelon. Yet, whether because of food safety concerns, increased health consciousness or a trend away from consuming cabbage, the traditional cole slaw made with mayonnaise or buttermilk is more like an after thought and a compulsory dish that remains unfinished after everyone has gone home from the picnic or barbeque.

Interestingly enough, the history of Cole Slaw is much more interesting and not the creation of Colonel Sanders as a cheap side dish that comes with your order of fried chicken at KFC. Cole slaw was brought to the United States by the Dutch and known as “koolsla”,  kool (cabbage) and sla (salad). Typically the shredded cabbage was mixed with vinegar, oil, salt, black pepper and even melted butter.

Regardless of its origins and how the ingredients have changed, there are many variations to cole slaw today from a wide range of countries to provide an alternative to the traditional mayonnaise based cole slaw. Lebanese style cole slaw is extremely versatile and whether served with kufta, hamburgers, sausages or barbeque is a tangy light alternative to the traditional that will neither remain uneaten or spoil in the heat of the summer outdoor dining.

Lebanese Style Cole Slaw

Lebanese Style Cole Slaw

Ingredients & Instructions:

4 Cups of Thin Shredded Cabbage (I like the green leaves to be included)

2 Teaspoons of Minced Garlic

2 Tomatoes Diced

1/4 Cup of Olive Oil

1/3 Cup of Lemon Juice (To Taste)

2 Tablespoons of Dried Mint

1 Teaspoon of Salt (To Taste)

Mix all of the ingredients together, except the olive oil and lemon juice. Allow the mixture to rest for 15 minutes to bring the flavors together and the cabbage has slightly wilted. Add the lemon juice and olive oil and mix well. Taste and add more lemon juice and salt as needed.

 

Tapas, Antipasto & Mezze – Mediterranean Inspired Cuisine at Home

The similarities shared between Spanish Tapas, Italian Antipasto and Middle Eastern Meze is far more important than the differences. At the heart of these ethnically inspired dishes are the shared ingredients that exist throughout the Mediterranean and the simplicity in which these dishes are prepared and presented.

Mezze Served At Home

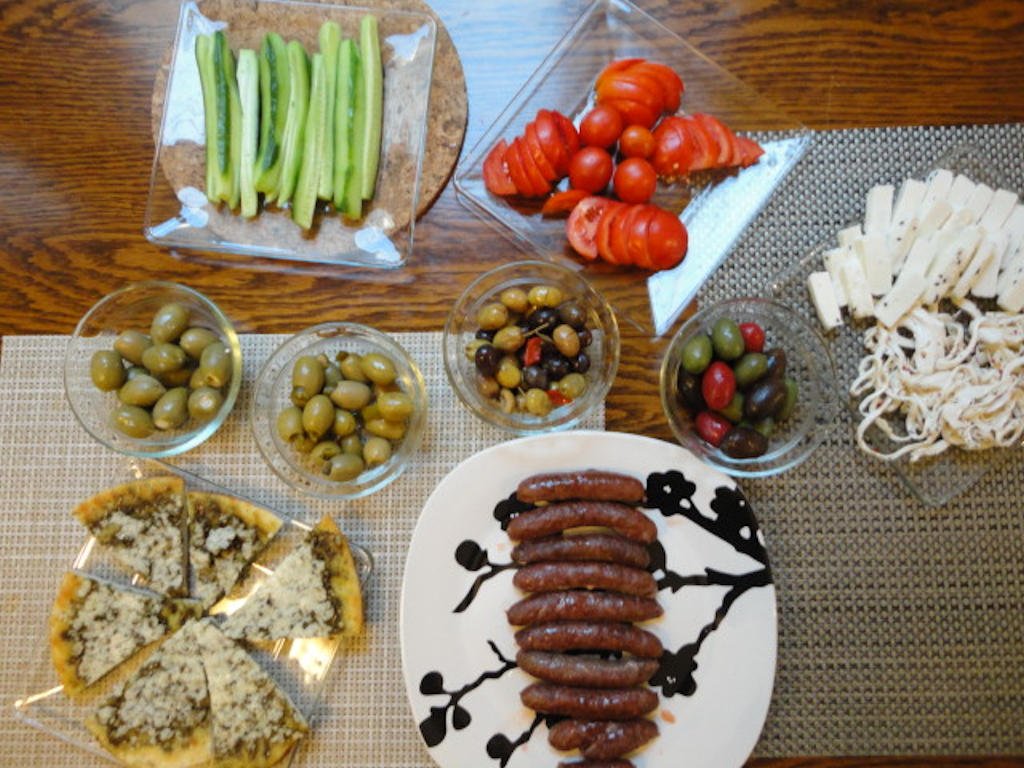
Mezze Served at Home (Sausage, Olives, Vegetables, Cheeses and Pita Bread with Zatar and Cheese)

For me, the heart of these culturally inspired dishes is the following components; the apparent simplicity of preparation, a meal slowed down creating an environment for conversation, the infinite possibility of combinations of a few key ingredients in a numerous selection of small dishes, the lightness of the meal and the relative ease in which the meal is cleaned up at the end.

Despite the differences in origins, the meanings of the words and when and how the dishes are served; there is an underlying unifying concept and idea of these small dishes. In many instances, the dishes are prepared with one or more of the following five ingredients; olive oil, garlic, cheese, vegetables and meat in each dish. There are traditional examples for Meze, Antipasto, and Tapas, but the reality is that anything is possible.

Arabic Cheeses Served as Mezze

Arabic Cheeses Served as Meze

At home, we typically enjoy Meze inspired dishes for a meal, but more often than not, it is what is in the refrigerator. It is a meal more known for a variety of offerings, then its complexity and effort of cooking. Our most recent meal consisted of a variety of olives, cheese, baked Lebanese sausage and sliced garden fresh tomatoes and cucumbers served with pita bread. The meal was finished with a plate of cold sliced watermelon. We follow no hard rules on what is to be served and the combination of plates to be used. It is more about providing a variety of options and enjoying the time spent as you select the next bite to eat.

Pita Bread Topped with Zatar and Melted Cheese

Pita Bread Topped with Zatar and Melted Cheese

I consider myself fortunate to have experienced all three of the meal in an infinite number of combinations. Raised in an Italian-American family exposed me to antipasto from a few simple ingredients on a plate to a platter overflowing with meats, cheeses and a wide assortment of prepared vegetables. Living in the culturally diverse city of Houston has provided me the pleasure of enjoying Tapas in a Spanish restaurant with friends where the selection of plates is so varied that even the pickiest eater can find something to enjoy. Being married to a Lebanese has exposed me to the infinite numbers of combinations of cheese, meats, spices and vegetables that can me put together for Meze.

Bowl of Garden Grown Cherry Tomatoes

A Meze Dish can be as Simple as a Bowl of Home Grown Tomatoes

At the end of the day, this Mediterranean inspired meal of small dishes is about the simplicity of preparation, not wanting to attend a hot stove or oven, the variety of flavors and ingredients available and when the meal is finished the speed in which the kitchen is cleaned. I enjoy these meals of small dishes any time of the year, but I myself wanting this meal most after working in the garden for most of the day.


Smoke me a Kipper, I’ll be back for breakfast

Okay I’m haven’t been smoking herring to make kippers, but it is a line from the TV show Red Dwarf. Anyway I have been smoking fish for a couple of dishes I will be making later. The other week I took apart the grill and smoker attachment and gave them a good clean for the summer barbecuing. I have a Weber Kettle grill with a gas starter. It has all the convince of a gas grill, but you still get the flavour from the charcoal.

When I arrived in the US, I bought a smoker attachment for the Weber called the ‘Smokenator 1000‘. Rather than buying a dedicated smoker, this simple piece of metal fits under the main grid to provide indirect cooking and a water dish to keep the temperature down and to provide moisture to prevent the food drying out. The Smokenator holds enough coals and wood to provide enough fuel for 6 hours of cooking which given that fish usually only takes about 2 hours in the smoker, you could cook a lot of smoked fish for the freezer or cook something else after the fish has cooked.

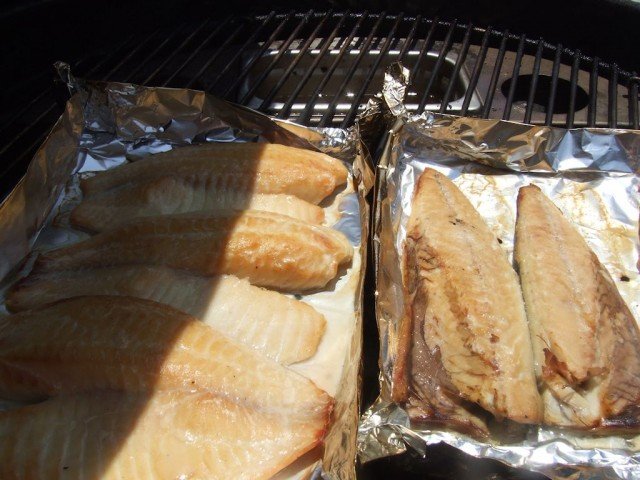
Smoked fish on the Smokenator 1000

Smoked fish on the Smokenator 1000

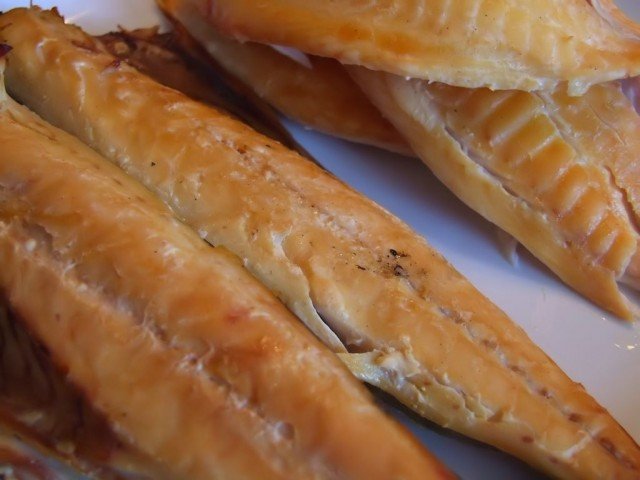
I smoked two types of fish, mackerel and tilapia. The only place that I could find mackerel in Houston was in the freezer section from the local Asian Supermarket. I wanted to get haddock to smoke, but it is nowhere to be found, but what I want it for tilapia is okay.

Low and slow smoked fish

This is a low and slow method for cooking fish in a smoker. First set-up your smoker with enough charcoal and wood chunks for at least 2 hours of cooking. Adjust the air vents until the temperature of the smoker is at a steady 240F (115C). Make a little foil dish for the fish and pierce one hole in the bottom of it. Make sure the fish is clean and place it on the foil dish and put it into the smoker. Wait for 2 hours and remove the fish. You can now use the fish for whatever dish you want or freeze it for later.

Smoked mackerel and tilapia

Smoked mackerel and tilapia

Alternative method for smoked fish

If you don’t have a smoker, you can still make smoked fish in a charcoal grill, but the process is hotter, quicker, and it has the potential to dry out the fish. To help prevent the fish from drying out too much, you should soak the fish in a brine solution for at least a couple of hours before cooking. Bring the charcoal up to normal cooking temperature and place them to one side of the barbecue. Place the fish on the other side of the barbecue, away from the coals. Throw on a handful of pre-soaked wood chips on the coals and close the lid of the barbecue. The fish should be ready to eat in about 20mins.


Egg Salad Sandwich…Traditional, Easy, Comfort Food

Why even write about an egg salad sandwich? Surely there must be more interesting and exotic pairings available for discussion and review? Of course there are options that are far more interesting, but when it comes to simplicity and ease, the egg salad sandwich is hard to beat.

Fresh Made Egg Salad Sandwich

Homemade Egg Salad Sandwich

It requires little effort to think of the infinite number of food pairings combined between two slices of bread, stuffed into a split roll, wrapped in pita or topped on a piece of bread (open faced). Whether you order a sandwich from a deli, diner or one of the numerous sandwich shop chains that all are attempting to differentiate themselves, the options are staggering. Yet, despite all of these options, the ability to order an egg salad sandwich is far and few between.

Egg salad has been around for over hundred years, sometime in the 1800’s, but not before 1762 (formal invention of the sandwich) with the modern rendition of mayonnaise being defined in 1756. One could say that egg salad represents English-French harmony at a time when their military’s were battling one another across Europe. Regardless of its beginnings, egg salad became a part of American cuisine and available to lunch patrons, served on a bed of lettuce in the early 1900’s. In time, the salad was placed between two slices of bread.

A Bowl of Peeled Hard Cooked Eggs

Peeled Hard Cooked Eggs in Bowl

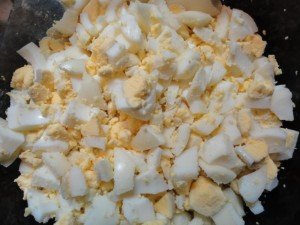
A Bowl of Hand Diced Eggs

Diced Hard Cooked Eggs in a Bowl

Homemade Egg Salad

Homemade Egg Salad (Eggs, Black Pepper, Salt & Mayonnaise)

The effort to make an egg salad sandwich is minimal with the final result being comfort food, a memory of sandwiches that our mothers made for us as children. Most of us have the five basic ingredients (eggs, mayonnaise, salt, black pepper and bread) in our kitchens almost all of the time. The following recipe is enough to make four sandwiches and can be increased or decreased with no difficulty.

Ingredients:

  • 8 Peeled Hard Cooked Eggs (Baked or Boiled)
  • 3 – 4 Tablespoons of Mayonnaise (Substitute 1 – 2 Tablespoons of Mayonnaise with Dijon Mustard for a tangy alternative)
  • Salt & Black Pepper
  • 8 Slices of Bread (Wheat, Sourdough, Rye, or your personal preference)

Instructions:

  1. Slice and Dice the Peeled Eggs (I find using a butter knife with the egg in the palm of my hand the easiset.)
  2. Add the Salt and Black Pepper to taste (a pinch or two) and mix well.
  3. Add the Mayonnaise, mixing the entire ingredients well.
  4. Make your sandwiches.

An Egg Salad Sandwich described above is simple and satisfying, but also provides a background for numerous possible combinations. One can mix in diced pickles / vegetables, relish, spices and herbs in addition adding lettuce, arugula, tomatoes or cucumbers to the sandwich. If you want to forgo the bread completely, a scoop of egg salad on a bed of lettuce or sliced ripe tomatoes is very nice or stuffed into scooped out tomato or sweet red bell pepper is just enjoyable. In the end, the question to ask is when was the last time you either made or ate egg salad?


Memories of home – Macaroni cheese

Macaroni cheese (mac and cheese in the US) is my ultimate comfort food. It is the one dish that every one of my siblings asks mum to make when we visit home. Like everyone else’s mum would say, my mum’s macaroni cheese is the best, and nothing else comes close. Not only does it fill you up with a satisfying, comma inducing carbohydrate load, it is the taste of home, and where the food plays second fiddle family conversations.

It is agreed by historians that the word ‘macaroni’ comes from a Greek funeral dish called ‘makaria’, however this is a broth made from barley rather than pasta. It is a commonly held belief that Marco Polo introduced macaroni to Italy from China in 1292, but it has since been shown that macaroni existed in Italy at least a century before then. Another interesting fact is that it is claimed that Thomas Jefferson, the 3rd president of the US, was responsible for the introduction macaroni to the US after visiting Italy and France. He initially commissioned a machine to make macaroni, but had to resort to import one from Italy.

Macaroni Cheese

Macaroni Cheese

My mum’s Macaroni cheese

The real key to this recipe is the type of cheddar. It isn’t anything special, my mum uses Cathedral City Extra Mature Cheddar, but it should be ‘real’ cheese and as strong and mature as possible.

Ingredients

  • 8oz (235g) macaroni
  • 8oz (235g) grated mature cheddar cheese + 1oz (30g)
  • 0.5 UK pint (285ml) of milk. UHT or Semi-skimmed (2%)
  • 4oz (120g) plain (all purpose) flour
  • 2oz (60g) butter
  • 1 medium onion, chopped finely
  • Salt and freshly ground black pepper

Instructions

Add the macaroni and the chopped onion to a pan. Cover with water and bring to a boil. Cook the pasta until it is just ‘Al dente’. In a saucepan, melt the butter, add the flour and stir to make a ‘roux’. Gradually add the milk while continually stirring to prevent lumps from forming. Continue to stir until the sauce thickens. Add the majority of the grated cheese to the sauce and stir until it melts. Taste the sauce and season with salt and pepper. Add the macaroni to the sauce and mix to combine. Pour the macaroni cheese into a shallow casserole dish. Add some sliced tomatoes (optional) and then cover with the rest of the cheese. Place the casserole dish under the grill (broiler) until the cheese is golden brown and bubbling. Serve with garden peas or green beans and enjoy.

Comfort food heaven - Macaroni Cheese