Canning Jams, Jellies, Preserves and Marmalade, Not As Difficult As You Might Think

Homemade Peach Jam

Homemade Peach Jam, May 2012

Homemade Blackberry Jam

Homemade Blackberry Jam, June 2011

Homemade Garden Grape Jam

Homemade Garden Grape Jam, June 2011

Unless one has distaste for foods that are sweet, how can you not like jams, jellies, preserves or marmalade’s? Whether served with butter and toast, peanut butter on a sandwich, mixed with plain yogurt or used as a glaze for pork or chicken, these transformed fruits are wonderful. What is even more wonderful then store bought jams, jellies and preserves are those that are made at home?

For me, canning fruit is a natural extension of picking too much fruit at the “pick your own” fruit orchard. As with almost everyone, I enjoy the taste of fresh picked fruit, but there is a tendency to pick too much fruit at an orchard. Likewise, I am not above accepting a large box of oranges from a friend of a friend who has access to an family owned orange grove. Regardless of how I come to possess a large amount of fruit, even as I am eating the fruit, I am starting to plan and allocate time for the canning of fruit jam and marmalade’s.

I will not lie; every time I make fruit jam I am convinced I am going to produce a final product that has gone horribly wrong. Whether the jam that does not properly set, the jars are not properly sterilized creating an environment for botulism, or that a vacuum is not created with the lids requiring the redo. Despite these concerns, it is only the former; fruit (Peach and Orange) not perfectly setting that has been a slight issue.

The process for making jams is quite simple and is not as mysterious as we may think. As with most efforts in the kitchen that use the words; homemade, from scratch, artisan and like grandmother used to make, there is a little more effort and time involved, but nothing that is impossible or too difficult to attempt. Despite the perceived mystery behind canning fruit, in the long history of preserving food, canning is a relative newcomer with only 200 years of history and 150 years for home canning (using glass jars). Prior to canning, the preserving of fruits and vegetables was achieved through drying, cold storing (cellar), pickling, sugaring (syrup), or salting. All of these methods were effective to plan that there was food available during the months when fruits and vegetables were not available for harvest.

Quick History Lesson:

  • 1795 the French military offered a cash prize for a new method of preserving food.
  • 1806 Nicolas Appert proved that food could be preserved by sealing it in a metal can and then heating the entire contents.
  • 1810 and onwards, commercial canning operations were established throughout mainland Europe, Great Britain and the United States. Over time the process improved, but the lead solder used to seal the seam of the cans was a source of lead poisoning.
  • Although home canning was gaining acceptance during this time, it was not until 1858, when John L. Mason, a tinsmith developed the process of cutting threads into glass jars allowing for the lid to be secured during the sealing process creating the vacuum seal
  • 1862 Louis Pasteur with Claude Bernard proved that bringing foods to a specific heat would destroy most bacteria and molds present, reducing the opportunity for spoilage. What had been achieved for the prior 60 years was now understood and today we know this process as Pasteurization.
  • The next 100 years realized continued improvements and refinements to the home canning process, but the basic process of sealing and applying high heat to the contents remains basically the same.
Homemade Orange Marmalade

Homemade Orange Marmalade, December 2011

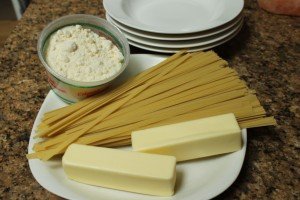
The requirements to produce homemade jams, jellies, preserves or marmalade is relatively simple. Most recipes require between 3 – 4 pounds of fresh picked fruit (local fresh picked fruit is superior to fruit purchased in grocery stores for canning), sugar, pectin, mason jars, lids, screw caps, a large deep pot to open boil the sealed jars, canning rack (I do not use this implement – shame on me) a large mouth funnel and tongs. In addition to the instructions on the back of the box of pectin, the instructions from Ball is a great step by step how to can fruit at home in the kitchen. Both Ball and Sure-Jell are great resources to answering all of your questions and concerns. These two companies are in the business of ensuring that the process to can fruits in the kitchen is easy and safe. For if you are unsuccessful then they are unsuccessful.

Almost all grocery stores carry the necessary supplies needed for home canning; pectin, jars, lids and screw caps. The glass mason jars are reusable year after year as long as they are not damaged. I do not have a problem purchasing additional mason jars each year, but I have found that my friends and family are very conscientious in returning the empty mason jars back to me. I am not sure if this is because they realize that mason jars are an expense or this is their subtle way of letting me know that they would like more of the homemade jams and marmalade’s I produce? It is also important to give a jar or two of prepared fruit back to the person that supplied you with the fruit if you received your fresh fruit as a gift. I have found that this ensures an annual supply of fresh picked fruit available for canning.


The easy way to peel peaches

Since there has been a glut of peaches at the moment, I thought I’d share the quickest and easiest way to peel peaches, or nectarines (technically a peach), apricots, etc. If the peach is very firm you could use a vegetable peeler or knife, but more often than not, peaches are too soft when you come to use them. Whether  you are making jam, compote, cobbler or empanadas,  this method will help you process a large number of peaches quickly. The next task is removing the pip (pit). How easy this will be, depends on on whether the variety of peach is cling or freestone.

The easiest way to peel peaches

1. Cut a cross in skin of the bottom of the peach (opposite end from the stem)

Cut a cross in the bottom of the peach

2. Bring a pot of water to a roiling boil and then drop to a simmer. Drop the peaches, a few at a time in the water to blanch for about 45 seconds.

Drop the peaches into boiling water

3. Remove the peaches from the boiling water using a slotted spoon and transfer to a bowl of iced water to stop the peaches from cooking. After about 20 seconds in the ice bath, remove the peaches and let them drain.

Drop the peaches in an ice bath

4. You should now be easily able to peel the skin from the peaches. If not, then repeat steps 2 to 4.

Peel the peach

True Alfredo v. Faux Alfredo

I love a good Alfredo sauce!  Sometimes I am in the mood for  the nouveaux version, which is cheesier than the traditional Alfredo which is just four, simple, ingredients.

Fettuccine Alfredo

Original Fettuccine Alfredo

The real “alfredo” was invented by a chef named Alfredo di Lelio, in Rome, in the early 1900’s.  He created it to help his poor wife who had lost her appetite after giving birth. It is calorie laden for sure!   It would have been the typical cheese on pasta except he added much more butter.  Of course it was better!

Butter makes everything better.

He began serving this dish in his restaurant, much like a formal caesar salad would be prepared, table side, today.

The American version came about due to the differences in cheese and butter quality between Europe and America. Also, preparing it table side, had it’s hand as well. It assured the cheese was perfectly melted and served piping hot and fresh, before it had a chance to begin to congeal.  The easiest way to solve that problem was to add cream: hence the American version of Alfredo.

Take it one step further, swap the cream for cream cheese, and you have the most modern twist of a basic sauce. Make the cream cheese “lite” and you can even shave off a few calories, earning room for a larger serving!

Try each of the versions and pick a favorite!  When making the original, get the freshest, best cheese and butter you can find.  For the Faux-Alfredo, you can go “light” by using fat free cream cheese but of course, it’s not nearly as good.

Original Fettuccine Alfredo

16 oz. fettuccine (fresh would be best)

True Alfredo has only 4 Ingredients!

Approx. 1 cup of pasta water

2 sticks of butter cut in small cubes

3 1/4 cups grated Parmesan Cheese

Cook pasta until just barely al dente, according to package directions.

Drain but reserve about two cups of the pasta water. (Don’t forget!)

Bring 3/4 cup of the pasta water and the butter, to a boil in a large skillet. Add pasta and sprinkle with cheese. Toss until a rich creamy sauce is formed, adding more pasta water as necessary.

Buon Appetito!

 Faux Alfredo

16 ounces fettucini pasta

2 cloves garlic, minced

2 tbsp oil

8 oz Philadelphia Cream Cheese cubed (low fat if you prefer)

1 cup Milk

1/3 cup Parmesan Cheese

1/2 tsp salt

Quick grind of fresh pepper

Cook pasta until al dente, according to package directions, and drain reserving one cup of pasta water.

In a large saucepan, lightly saute garlic in olive oil until translucent but do not brown it.

Add milk, cream cheese and heat over a very low heat, stirring then whisking until well blended. Add 1/2 tablespoon of salt and a few quick grinds of fresh pepper.

Remove from heat and stir in Parmesan cheese.  Add pasta water, if necessary, to thin consistency.

Toss in pasta and serve immediately hot with extra Parmesan cheese.  Enjoy!

Faux Alfredo


My new obsession – The Vietnamese sandwich – Bánh mì

I met my friend Steve for lunch last week, who suggested we go to a sandwich shop he had just tried in Chinatown. I wasn’t sure what kind of sandwich I was expecting, but I was amazed at the sandwiches on offer. Don’s Cafe sells Vietnamese sandwiches called Bánh mì (pronounced BUN-mee), which is the Vietnamese word for bread, but has also come to mean sandwich.

Special BBQ Chicken and Shredded Pork Banh mi

Special BBQ Chicken and Shredded Pork Banh mi

During French colonialism in Indochina, the baguette was introduced and the locals developed their variation which used rice and wheat flours, making a lighter, crispier bread with a crackly crust and an airy crumb. After the French pulled out in 1954, and the importation of French ingredients came to a halt, the Bánh mì sandwich was born using the baguette with local Vietnamese ingredients such as chillies, cilantro (fresh coriander), daikon ( Chinese radish) and pickled carrots. Nowadays, Bánh mì are available  throughout the world, wherever there is a Vietnamese immigrant population.

Afterwards I spoke to Bill about my new find, and he said that he already knew about Bánh mì. I can’t believe he had been keeping this secret from me. I’ve now been back twice to try these delicious sandwiches, and I’m hooked.

As I have said the type of baguette is far lighter in texture than French baguettes which does add a more-ish quality. The baguettes are usually spread with mayonnaise, thin slices of cucumber, cilantro, chillies and pickled carrot are added and then the main filling choice. The main filling choices include BBQ, grilled and shredded chicken, beef and pork,  as well as pork meat balls, and pate. The sandwich is then cut in half and wrapped in paper for easy eating. At less than $3 per sandwich these are the best value, tastiest sandwiches you can find anywhere. You could buy 2 of these and still have change left over compared to some big national sandwich chains.

At most Vietnamese sandwich shops you will also find Phở, a Vietnamese noodle soup, but I will save that for another day as it is a subject in its own right.


Homemade Sausage: Preparing The Sausage Recipe

For reasons for which I inherently understand, but cannot fully explain is that when preparing the sausage recipe allowing time for the seasonings and spices to infuse into the meat, significantly increases the depth and complexity of the overall flavor of the sausage is achieved.

Seasoning and Spices with Ground Pork to Make Sausage

Dry and Wet Ingredients with Ground Pork in the Mixing Pan

Although these steps refer to Ground Pork, these instructions are relevant for any ground meat that is to be used when making sausage.

Mixing Ingedients for Hot Italian Sausage

Thoroughly Hand Mix The Ingredients with the Ground Pork

  1. Select the desired sausage recipe and confirm that you have all of the necessary ingredients.
  2. Grind the Pork Loin and Pork Fat Trimmings together, thoroughly mix and place in the refrigerator to chill for at least three hours. Overnight is preferred.
  3. Combine all of the dry seasonings and spices in a bowl.
  4. If there are wet ingredients (minced garlic, wine, chipoltes), combine these ingredients together in a second bowl.
  5. In a large bowl or mixing pan, add your ground meat and then add the dry and wet ingredients.
  6. Mix all of the seasonings and flavorings thoroughly with the ground meat ensuring that all of the ingredients have been thoroughly incorporated into the ground meat.
  7. Once the sausage mixture has been thoroughly mixed together, cover and allow the combined ingredients to chill for an an additional three hours. If possible, overnight in the refrigerator is optimum.

Note:

Chilling the mixture for at least three hours accomplishes two objectives. First is to ensure that the flavors have had enough time to be absorbed by the ground meat (in essence marinate). Second, well chilled sausage mixture is easier to use with the Kitchen Aid sausage stuffing attachment.

Prepared Hot Italian Sausage Mixture

Ground Pork with Ingredients Thoroughly Mixed Together

Once the flavors have thoroughly infused into the ground meat and it has been thoroughly chilled, the mixture is now ready to be stuffed into sausage casings.

These recommendations for preparing the sausage mixture ahead of time are not exclusive to preparing the ingredients for making sausage. I have discovered over time that when preparing ground meat with seasoning for burgers or meat loaf, the overall flavor profile of the meat is enhanced when sufficient time for the seasonings to marinate with the meat is allowed.