Jalapeno Brined Roasted Chicken

To brine a chicken or a turkey is nothing new or revolutionary when it comes to adding additional tenderness and flavor to the bird. Hundreds recipes available on-line provide the basic ingredients (sugar, salt, water and seasoning) and the steps required. What I have learned is that to brine a chicken is very simple and beyond the basic ingredients of the brine, the limitation of an individual’s imagination is the only constraint to imparting flavors into the chicken.

Whole Chicken in a Pot of Brine

Whole Chicken Submerged in a Brine Solution with Jalapenos

I was looking to do something different for the whole chicken that I going to roast. I wanted to add some “kick” to the chicken. I thought to add jalapenos to the brine would be a worthy addition and experiment. When you are confident enough in the kitchen that even a potential failure is a learning experience, you are willing to risk a meal that does not live up to your expectation. Note: This meal was a success, but lessons were learned.

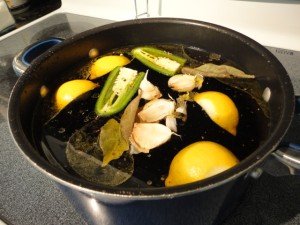
Brine with Jalapenos for Chicken

Jalapeno Brine for Whole Chicken

Plate Used to Keep Chicken Submerged in Brine Solution

Plate Used to Keep Chicken Submerged in Brine Solution

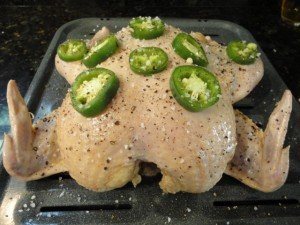
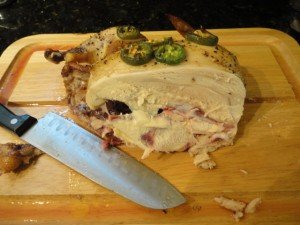
Jalapeno Brined Chicken Seasoned with Sliced Jalapenos, Salt and Black Pepper

Jalapeno Brined Chicken Seasoned with Sliced Jalapenos, Salt and Black Pepper

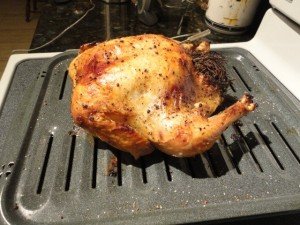
Roasted Chicken Brined and Topped with Jalapenos

Roasted Chicken Brined and Topped with Jalapenos

To brine a chicken requires a lot less effort and time then to brine a turkey, but there is still an element of planning required. At a minimum, the process starts the morning you are going to brine the chicken, but preparing the brine the day before provides you with much more flexibility.

Ingredients for the Jalapeno Brine:

  • 1 Gallon of Water
  • 3/4 Cup of Sea Salt (preferred, but Kosher or Table Salt will work)
  • 2/3 Cup of Sugar
  • 3/4 Cup of Soy Sauce
  • 1/4 of Olive Oil
  • 20 Cranks of Fresh Cracked Black Pepper
  • 1 Jalapeno sliced in Half (you can use more jalapenos)
  • 1 Lemon Quartered, Squeezed and Dropped into the Pot
  • 4 Garlic Cloves Crushed (do not need to peel)
  • 2-3 Bay Leaves

Instructions to Brine the Chicken:

  1. Add all of the ingredients together in a large pot, bring to a boil, stir and then allow the brine to cool to room temperature. To chill the brine quicker, use only half of the water when boiling and add the remaining water in the form of ice after the brine has been boiled.
  2. Place the whole chicken which has been defrosted, washed and the giblets removed into the pot (breast up). You may need to remove some of the liquid and / or place a plate on top of the chicken to keep it submerged.
  3. Place pot in refrigerator and brine the whole chicken for a minimum of four hours, but longer is better, but no more than twenty-four hours. Regularly rotate the whole chicken so the breast and drumsticks / thighs are facing up will ensure that the “heat” from the jalapenos is equally distributed to all parts of the bird.
  4. Thirty minutes before you are ready to roast the chicken, remove the chicken from the brine, wash, pat dry and place on a roasting pan. Then lightly coat the bird with Olive Oil and season with Black Pepper, Salt and Sliced Jalapenos.

Roasting a chicken is one of the simplest, easiest set of instructions to follow in the kitchen. Go to Roasting a Whole Chicken is Easy for simple to follow steps in preparing a perfectly roasted whole chicken.

The Jalapeno Brined whole chicken was succulent, flavorful and had just the hint of jalapeno. It was a worthy experiment that I will repeat again. As mentioned above, it is important to rotate the chicken in the brine. I did not do this and my chicken was breast down in the pot. Capsaicin the chemical compound in hot peppers that provides the heat (piquance / piquant) is soluble in vegetable oil, then alcohol and only slightly in water. Therefore, the capsaicin in the brine was concentrated in the olive oil that floated on the surface of the brine and not in the brine solution itself. The drumsticks and thighs were most impacted from the jalapeno peppers in the brine and in turn most flavorful. In addition to rotating the chicken, I will also insert slices of jalapeno peppers under the chicken skin to boost the contact flavor of the peppers to the meat.

This recipe can also be applied to individually cut chicken parts; Leg Quarters, Drumsticks, Thighs, Bone-In Breast Halves, Wings and Boneless Breasts and Thighs. The time required to brine these individual piece varies between two to four hours depending on size and thickness.

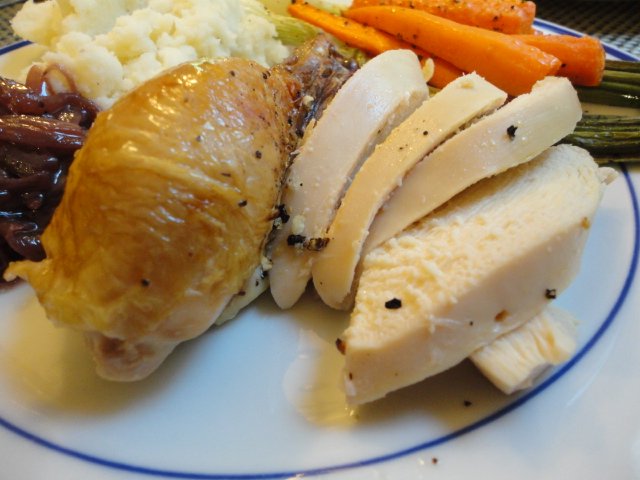
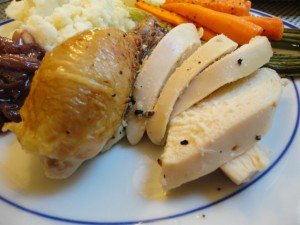
Carved Roasted Chicken on a Plate

Jalapeno Brined Roasted Chicken on Plate


How to make homemade butter in a jar

I was going through the fridge and noticed that we had part of a carton of heavy cream that wasn’t going to be used any-time soon, and rather than just throwing it out, I wondered if there was something I could do with it other than using it for desserts. In the back of my mind I remembered making butter with my granny (grandmother) as a child and wondered if I could do it with a jar. I seemed to remember it took a long time and a lot of effort as a child, but how difficulty could it be as an adult.

Scientifically butter is a emulsion of water suspended in oil that is formed by the inversion of the cream, which is an emulsion of oil suspended in water, with the milk proteins acting as the emulsifier. In layman’s terms, if you take cream and shake the hell out of it you end up with butter.

I found a jar in the cupboard, which was just big enough to hold the cream, sealed the lid and started shaking vigorously. Very quickly I realised my first mistake. You need headroom in the jar, because you introduce air into the cream and it increases in size. I poured off half of the cream into a jug for a second batch and continued shaking the jar. After about 10 minutes of shaking and a full cardio workout, suddenly the sound in the jar changed from ‘sloshing’ to ‘slopping’ and butter solids magically appeared in the jar. I strained the solids over a bowl, and there sitting in the sieve was homemade butter. I used a spatula to gently squeeze out the remaining buttermilk to help stop the butter from going bad, added some salt and spread it on toast. Wow! It is hard to describe how good it was, except that it is better than any butter you can buy.

How to make homemade butter in a jar

Ingredients

  • Cream (any type will do)
  • Salt

Method

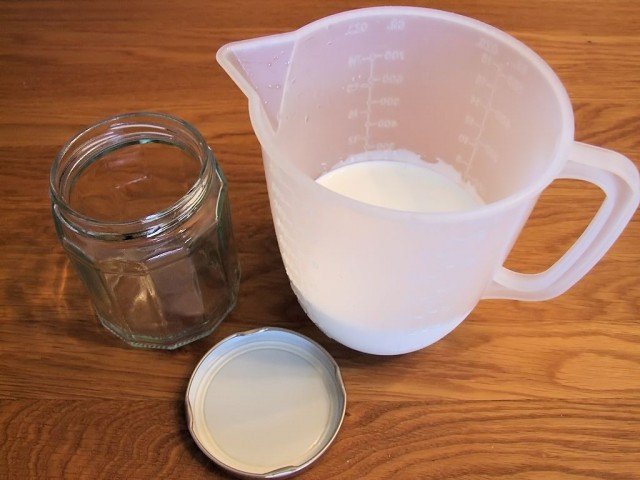
  1. Fill a jar or other seal-able container half full of cream.
    Step 1 - Cream and a jar
  2. Shake vigorously for about 10mins until butter solids start to appear.
    Step 2 - Shake the jar
  3. Sieve the butter and gently squeeze out the remaining buttermilk, which you can use for something else. Add a dash of salt to taste. I added about a quarter of a teaspoon of salt, starting with 10 fl oz of cream.
    Step 3 - Strain the butter from the buttermilk
  4. Simply enjoy spread on bread
    Step 4 - Enjoy spread on bread

Cover and refrigerate the butter. It should keep for a couple of weeks, if you have removed the buttermilk and aren’t tempted to eat it all in one sitting.


Houston’s Best Burgers

The Houston culture website 29-95, has a poll at the moment to find out what is the best burger in Houston. Coming from a country where the only burgers are McDonalds and frozen pub burgers, I was amazed at the choice and quality of burger joints in Houston. I have to say my all time favourite is the buffalo burger from Bubba’s Texas Burger Shack. Bubba’s really is just a shack under the 59 free-way, and if you didn’t know how good the burgers were, you would be tempted to drive past.

Other favourites of mine, in no particular order, are Bernie’s Burger Bus, Christian’s Tailgate and Sam’s Burgers, Fries & Pies. I’ll have to dig out a report done by Wouter, a Dutch friend, who along with others created ‘The Beer-aided yet Unbiased Ratings for Good Eats Results’ (BURGER) report of the best burger bars in Harris County.

Update: The winner of the 29-95 Houston’s Best Burger was the Little Bitty Burger Barn with 25% of the 11,000 votes cast. It’s been a while since I visited Little Bitty Burger Barn, so I think another visit is in order.

The Little Bitty Burger Barn

The Little Bitty Burger Barn


Roasting a Whole Chicken is Easy

Roasting a Whole Chicken must be one of the four primary purposes for which a modern electric oven was intended to achieve. The other three being; baking a pie, cooking a casserole and roasting a cut of beef.

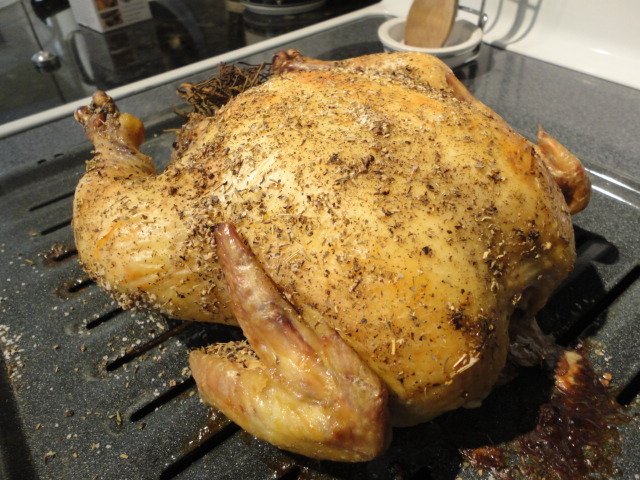
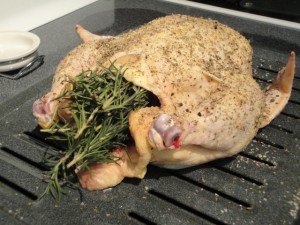
Roasted Whole Chicken

Whole Roasted Chicken

Roasting a chicken, yet alone a turkey seems to strike fear in most people. The truth of the matter is that there is no reason to “fear the bird”. Between the oven intended to roast a chicken, most whole birds already being injected with a salt water solution by the poultry processor and the instructions on the packaging being insanely clear, the chances of not presenting a whole roasted chicken that is flavorful, juicy and fully cooked is nearly impossible.

Carved Roasted Chicken on a Plate

6:00 PM – Sit Down to Eat

Whole Roasted Chicken being Carved

5:50 PM – Carve the Roasted Chicken

5:30 PM - Remove Fully Cooked Chicken from Oven

5:30 PM – Remove Fully Cooked Chicken from Oven

Whole Chicken Covered with Aluminum Foil

3:45 PM – Place Whole Chicken into the Oven

Whole Chicken Prepared for Roasting

3:30 PM – Season Whole Chicken

If there is one “unknown” that causes reluctance in roasting a whole chicken for a meal, it is the element of time. I am not talking about how long to actually cook the chicken, but the entire time required from start to finish.

The simplest way to explain how much time is required, let us work our way back to the beginning:

Example:

6:00 PM – Sit down to eat dinner

5:50 PM – Carve / Slice the Whole Chicken

5:30 PM – Check the internal temperature of the Chicken. If ready, remove the Chicken from oven and cover with aluminum foil. Use this time to finish preparing the side dishes for the meal.

5:00 PM – Remove the aluminum foil that is covering the Chicken in the oven. Use this time to prepare the side dishes for the meal.

3:45 PM – Place the Chicken, covered with aluminum foil on the middle rack of the oven

3:30 PM – Preheat the oven to 350 degrees Fahrenheit

3:20 PM – Season the outside of Chicken with your desired herbs and spices

3:15 PM – Remove the defrosted chicken from the vacuum sealed bag (remove giblets, set aside for gravy) / pot of brine, wash and pat dry.

Defrosting / Preparing the Whole Chicken:

These steps assume that you have taken the necessary steps prior to the 3:15PM for the whole chicken to be properly defrosted if previously frozen. I have found that 24 hours is enough time in the refrigerator to defrost a whole chicken (4 1/2 – 5 1/2 Pounds). To provide enough time to defrost a whole chicken in the refrigerator, place the vacuumed bag sealed bird in the refrigerator the prior day’s morning (30 hours of defrost time). If you are planning to brine the chicken, then additional preparation time prior to cooking is required.

Roasting Time (How long to cook a whole chicken)?

The rule of thumb is 20 minutes per pound of whole chicken. There is a lot of variability in roasting a whole bird, but this rule is a good one to follow.

Example: 5 pound bird will require 100 minutes in the oven.

When the chicken is planned to be done, check the internal temperature with an oven thermometer if you have not inserted a thermometer probe prior to cooking.  The chicken is ready when the internal temperature is 165 degrees Fahrenheit (USDA recommends and internal temperature of 180 degrees Fahrenheit). However, through the process of equilibration the internal temperature will rise to that recommended temperature as the bird rests covered aluminum foil for 20 minutes while you prepare the remainder of the meal.

There will always be an element of variability, but following these instructions will provide you with the basic guideline of how to plan the time required so that you are sitting down to eat the meal within 10 – 20 minutes of the original plan.

Previous Morning – Place Frozen Whole Chicken in Refrigerator to Defrost

As British as Fish and Chips

If you ever get the chance to visit the UK (or Ireland, Canada, New Zealand, Australia, New Zealand and South Africa) you’ll likely come across, or have heard of, and want to try ‘Fish and Chips‘. Though ‘Fish and Chips’ is well known as a British dish, it is a relatively recent addition to British cuisine, with the first ‘Fish and Chip’ shop opening around 1860, by a Jewish immigrant Joseph Malin. Joseph Malin didn’t invent the idea of frying fish in batter as this was probably introduced to Britain from Portugal, and he didn’t introduce the idea of frying chipped potatoes, as this was already being done in Irish and Scottish potato shops, but he was probably the first to combine the two to create ‘Fish and Chips’.

In most towns in the UK you’ll still find a ‘chippy’ or ‘chipper’ as ‘Fish and Chip’ shops are known, and it is still the most popular fast food in Britain, but it is under increasing pressure from alternatives such as Chinese and Indian takeaways, kebabs, pizzas, etc as well as declining North Sea fish stocks and an increasing health consciousness. Until recently, most fish you would find in ‘Fish and Chips’ shops were cod and haddock, but with declining fish stocks, you are likely to see plaice, coley, pollock and skate on offer as well.Chip shop chips are completely different to French fries, in that they are thicker cut, crisp on the outside, fluffy on the inside and should be generously covered in salt and malt vinegar.

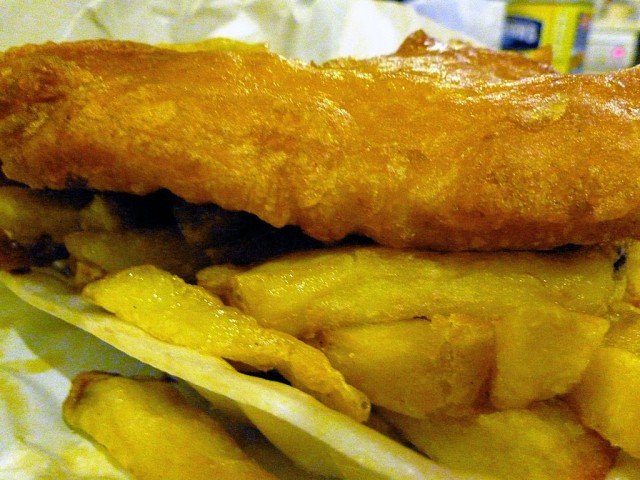
Fish and Chips

Fish and Chips

Other traditional delights to be found in British chip shops, include black pudding, white, haggis and red puddings, scampi, savaloy, pineapple fritter, mushy peas, pickled eggs and onions, smoked sausages, tartar sauce, etc, not to mention the deep fried Mars bar.

To make ‘Chippy’ Fish and Chips at Home

If you are unable to get a hold of proper fish and chips, then this method will help you re-create the experience as long as you follow each step.

Ingredients

  • 900g (2lbs) of fluffy (not waxy) potatoes such as King Edward, Maris Piper or Desiree
  • 2kg (4.5lbs)of beef dripping (vegetable oil if you must, but trust me, beef dripping tastes way better)
  • Salt and malt vinegar
  • 4 fish fillets. Firm white fleshed fish such as haddock, cod, coley, pollock are the best
  • 225g (8oz) flour, plus extra for dusting
  • 285ml (10fl oz) cold beer
  • 3 heaped tsp of baking powder

Method

First peel the potatoes and cut them in chips that have a 13x13mm (0.5″) square section. Soak them in plenty of cold water for 30mins, changing the water twice. Drain the chips thoroughly and wrap in a clean tea towel to dry them really well. Heat the oil to 110C (230F) and cook the chips for 10mins, making sure they do not turn brown. Drain them and place them on a tray in the refrigerator for 1 hour.

Heat the oil to 190C (375F) . Season both sides of the fish with salt and pepper and then dust them with a little flour. Whisk together the flour, beer and baking powder until you achieve a shiny, creamy textured batter similar to semi-whipped cream. Dip the fish into the batter to coat, allow the excess to drip off and them lower the fish into the oil, one at a time. Cook until the batter is golden brown and crispy, which should be between 3 to 5mins, depending on the size of the fish. Drain the fish and transfer to a 90C (195F) oven to keep warm.

Remove the chips from the refrigerator and cook in the 190C (375F) oil for 3 to 5mins until they are golden brown, crispy on the outside and still fluffy on the inside. Drain the chips, place on a tray and transfer to the 90C (195F) oven for 5mins. Remove the fish and chips from the oven. Lay the chips onto some greaseproof paper, onto of some newspaper. Sprinkle with some salt and malt vinegar. Lay one fillet of fish on top of the chips. Apply some more salt and vinegar. Wrap tightly in the paper and leave for 5mins to rest. They are best enjoyed eating with your fingers straight from the paper.