A refined ploughman’s lunch – fit for a queen

Though it’s popularity has declined in recent years, a ploughman’s lunch usually consists of crusty bread, a thick piece of proper cheddar cheese, ham, pickle, apple and onions served with beer. It used to be quite a common snack or lunch in pubs around the UK, but the decline of a pint at lunchtime, the rise in popularity of the sandwich, and people demanding more sophisticated food has meant a decline in this simple but tasty British classic.

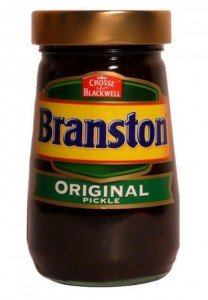
The name ‘ploughman’s lunch’ was coined by the Milk Marketing Board in the 1960s, to help increase the sales of cheese in the UK, but the dish itself exists before then, known as a ‘plough-boy’s lunch’. The pickle in a ploughman’s isn’t gherkins (pickled cucumbers), but it is a type of relish or chutney made from vegetables such as cauliflower, carrots, onions, gherkins and swede in a sauce made from vinegar, apple, dates, tomatoes and spices and sugar. The most common variety in the UK is Branston Pickle, which is available in the ethnic isles of some larger supermarkets in the US.

For our Diamond Jubilee party I de-constructed the ploughman’s lunch and using small pastry cases, re-build it as an Hors d’oeuvre. I made the pastry cases, since I wasn’t able to find suitable ones in the shops, but I’ll write about the pastry another time. In the meantime you could use my flour empanadas pastry recipe, cut out 2″ (5cm) circles, form them into shape in a 2″ (5cm) muffin tray and cook them at 400F (200C) for about 15mins.

Pastry Cases

Pastry Cases


Branston Pickle

Branston Pickle

Ingredients

  • 2″ (5cm) pastry cases
  • Cooked ham
  • Celery
  • Green onion (Spring Onion)
  • Cheddar Cheese
  • Granny Smith Apple
  • Lemon Juice
  • Mayonnaise
  • Branston Pickle


Method

Cut the ham, celery, onion, cheese and apple into 1.5″ (4cm) strips, about 0.5″ (1cm) wide. To prevent the apple going brown place it in a bowl with a little lemon juice. Squeeze a small amount of mayonnaise into a pastry case to act as a glue. Then add the strips of ham, celery, onion, cheese and apple end up into the mayonnaise. Add a small amount of the pickle. Enjoy with a nice cold glass of beer, or even a glass of bubbles.


Mini ploughman's

Mini ploughman's

El Reubeno Pastrami Sandwich at The Prado in Balboa Park (San Diego, CA)

While visiting San Diego, CA we spent a morning walking around Balboa Park, adjacent to the San Diego Zoo. Both attractions are must visits when in San Diego. The time was approaching lunch and after enjoying the attractions at the park, we were to head an hour north to the Temecula Valley to spend the afternoon tasting wines. We were deciding what we wanted to eat when we walked past the restaurant: The Prado at Balboa Park. A quick glance at the lunch menu showed the prices to be reasonable, so we decided to eat lunch.

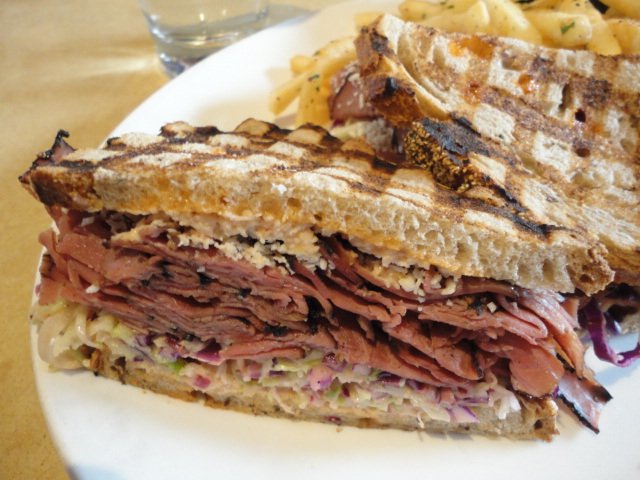
The Prado's El Reubeno Pastramo at Balboa Park in San Diego, CA

El Reubeno Pastrami at The Prado in Balboa Park - San Diego, CA

The Prado at Balboa Park is a full fledged restaurant, not a cafeteria or quick bite diner that one expects to see in most public parks and attractions. Service was excellent and the menu was very diverse. So here I am reviewing the menu and what do I read: El Prado Reubeno Pastrami. I read a word that looks like the word “Reuben” and it is included with the word “Pastrami”. I say that the menu appeared diverse in it’s offering, but let me be honest, I saw nothing else on the menu once I knew that I could order a Reuben Sandwich.

I was a little hesitant when I first read the ingredients, but then who am I to judged on a restaurant’s interpretation of a Reuben?

The ingredients for the El Prado Reubeno Patrsrami sandwich are listed as: Pastrami, Cotija Cheese, Chipolte 1,000 Island Aioli, Lime Coleslaw and New York Rye

Not exactly an exact interpretation of classic Reuben, but this is California so what is the possible downside? All of the ingredients sounded good.

The El Prado Reubeno Pastrami Sandwich was like nothing I have ever tasted before, yet none of the ingredients were foreign to me. The sandwich was amazing with every bite being as perfect at the previous bite. The portion of sliced Pastrami was generous and the remainder of the ingredients were perfectly portioned. The combination of the cracked peppercorn from the Pastrami complemented the smoky spiciness of Chipolte in the dressing and was perfectly matched with the acidity of the Lime of the Coleslaw and the saltiness of the Cotija Cheese. The Pastrami was tender and, the Coleslaw crunchy and the Rye Bread perfectly toasted. It was a perfect interpretation of a Reuben Sandwich.

Did I mention that the thin cut french fries were also very good?

Under the Reuben Sandwich Reviews, the El Prado Reubeno Pastrami is given a ranking of: Classic Representations / I think there are other items on the menu?


Quick & Easy Pasta Sauce (Dalla Ricetta Della Famiglia Fiorito)

Of all of pasta sauces that I prepare in the kitchen, whether handed down through the family or “invented” through my own experimentation, there is one exception. That is the sauce taught to me by my college friend Marco Fiorito many years ago when he came through Houston. Marco was born and raised in Italy and the sauce he made from me that night had been taught to him by his father.

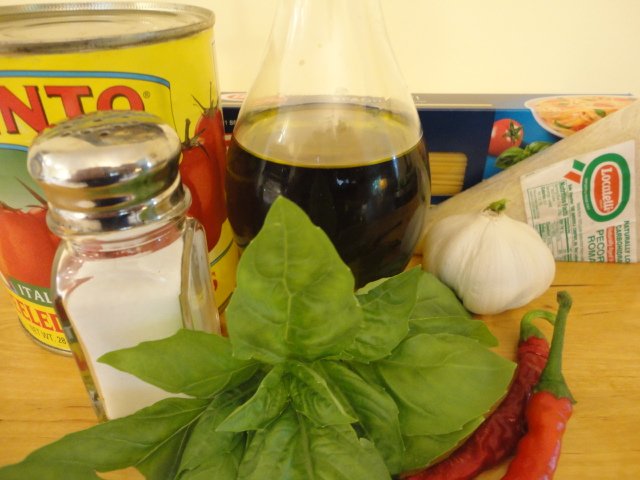
Ingredients for a Quick and Easy Pasta Sauce

Simple Ingredients to Make an Easy and Amazing Pasta Sauce

Even after all of these years it still amazes me that sometimes the best recipes and most satisfying meals are those that have the fewest ingredients, are the easiest to prepare and require the least amount of time. From start to finish this sauce requires less than 30 minutes to prepare and you are eating shortly thereafter.

Ingredients:

  • 28 Ounce Can of Whole Peeled Tomatoes
  • Olive Oil
  • Salt to Taste
  • 6 – 9 Fresh Basil Leaves
  • 1 Pound of Pasta (your personal choice)
  • Grated Italian Cheese (Romano or Parmesan)
Pasta and Sauce Brought Together in the Skillet

Pasta and Sauce Brought Together in the Skillet

Instructions:

  1. With a knife rough dice / chop the whole peeled tomatoes, saving all of the contents in the can (do not drain off the liquid).
  2. Peel the garlic cloves and slit the fresh hot chili peppers, but keep them whole.
  3. Heat a large deep skillet on High, drizzle in the olive and when hot add the garlic cloves and salt. You want to brown the outside of the garlic cloves, but do not burn them.
  4. Just before the garlic cloves have turned golden brown, add the chilis and move the skillet off of the hot burner.
  5. Add the diced / chopped contents of the whole peeled tomatoes to the skillet and place back on the hot burner, stirring all of the ingredients together and bring to a boil. Once the sauce has boiled, drop the temperature to Medium-Low
  6. On a second stove burner, begin heating a large pot of water seasoned with salt on High.
  7. You are looking to evaporate about half of the liquid and the time required, 10 – 20 minutes will depend on the original thickness of the liquid contents of the can of the whole peeled tomatoes. Stir the sauce every few minutes. Once you have achieved the desired consistency, remove the skillet from the heat.
  8. When the large pot of water has come to a boil, add your pasta, following the instructions to cook the pasta “el dente”.
  9. When the pasta has been cooked and has been drained, take the basil leaves in a stack and with a kitchen scissor cut them into small strips directly into the pasta sauce.
  10. Turn the stove onto high, place the skillet of sauce back on the burner and add the drained cooked pasta to the skillet and fully mix all of the ingredients together.
  11. Serve the pasta topped with grated cheese and enjoy.
Dalla Ricetta Della Famiglia Fiorito

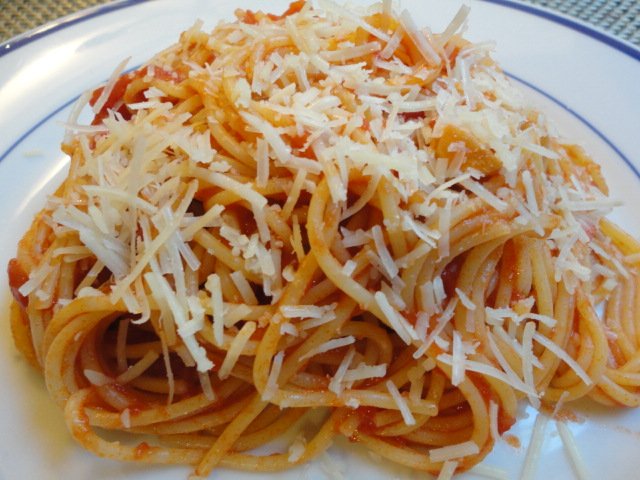
Quick & Easy Pasta on the Plate (Fiorito Family Recipe)

This dish is such a simple meal to be enjoyed with the rough chunks of whole peeled tomatoes combined with the fresh basil and the slight heat of the chilies. It is a pasta dish that is full of freshness and flavor that requires very little time and is superior to anything you can purchase in the grocery store. As Marco said to me, it is one of those go to meals for a bachelor, easy to make, little time required and with few ingredients. I agree with him and will add that whether cooked for one (with leftovers), for two or a family of four it is a great meal.


Here today, Scone tomorrow

Scones, how very British. A perfect way to celebrate the Diamond Jubilee by having afternoon tea with your best china tea-set, scones, butter or cream and strawberry jam. Scones origins are widely debated, but in Britain they are mainly to be found in Scotland, and the South-West of England where they are a component of the ‘Cream Tea’. Originally scones, where flat and round, similar to the Scottish griddle scone, which are cut into triangles and it wasn’t until the introduction of baking powder that the modern scone arose.

The proper British pronunciation of the word scone, backed up by the Oxford English Dictionary, is as in ‘con’, not ‘cone’. Our American cousins across the pond should take note, as they have a habit of calling them biscuits, which is all very wrong and confusing. Also if it wasn’t for the correct pronunciation, then this joke wouldn’t work.

Q: What happens to a scone when you have eaten it?
A: It’s scone.

The recipe below is for plain savoury scones, which can be used for jams, butter or cheese, etc, but by simply adding some sugar and raisins you can make fruit scones. I have also added blue cheese crumbles or bacon to the scone mix, which works wonderfully well.

Ingredients

  • 8oz (225g) Self Raising Flour (see below)
  • 2oz (50g butter or margarine
  • 4 fl oz (120ml) milk
  • 1 beaten egg or milk to glaze

To make Self Raising Flour

  • 8oz (225g) Plain Flour
  • 1 tsp Baking Powder
  • 0.5 tsp Bicarbonate of soda
  • pinch of salt

Method
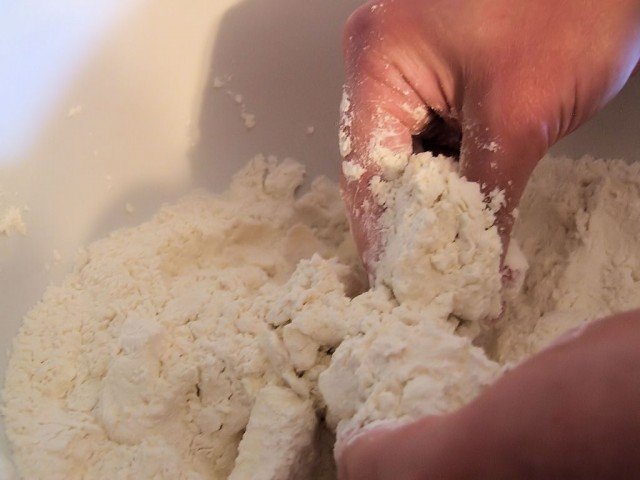
Pre heat the oven to 400F (200C). Sift the flour into a mixing bowl, to introduce air, and then rub in the butter with your fingers until it resembles fine breadcrumbs.

Rubbing the butter into the flour

Rubbing the butter into the flour

Pour in just enough milk to make a soft spongy dough mixing with a fork. Note, it is better for the dough to be slightly soft rather than too dry. Turn out the dough onto a floured surface. Knead the dough briefly until it is just smooth. Note, Do not over handle, or the scones will be tough.

Lightly roll the dough until it is roughly just less than an inch (2cm) thick. Use us 2.5″ (6cm) pastry cutter (I used a smaller one) to cut out the scones, be careful not to twist as you pull the cutter from the dough, otherwise the scones will rise in strange twisted shapes. Gather up the trimmings, roll out and cut more scones.

Rolling out the dough

Rolling out the dough

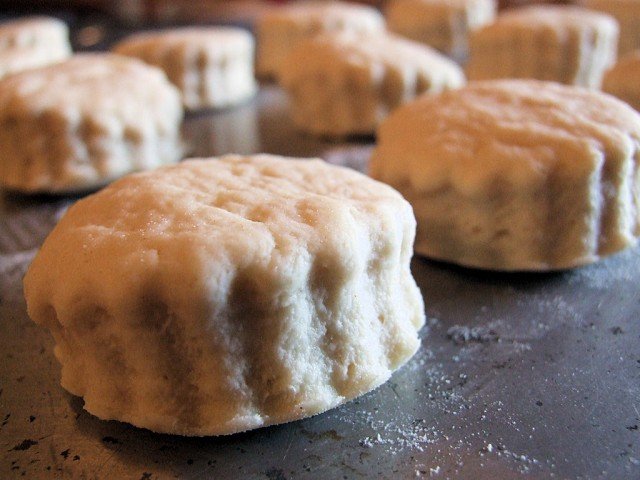
Place the scones onto a greased baking sheet , brush with egg or milk and bake for approx 15mins.

Scones ready for the oven

Scones ready for the oven

Leave to cool on a wire rack slightly, before splitting them and enjoining with strawberry jam, cream or butter, and tea. Scones freeze very well and can then be heated up quickly in the oven to enjoy at any-time.

Afternoon tea with scones

Afternoon tea with scones

Blue Water Seafood Market & Grill – San Diego, CA

Recently I have had dinner with friends at the Blue Water Seafood Market & Grill in San Diego, CA. What I did not know until we walked in to the restaurant was that the place had been featured by Guy Fieri, of Food Network’s Diners, Drive-Ins and Dives. I quickly recalled the episode which I had recently watched and my mouth was watering in anticipation.

We walked in and were immediately standing in line waiting to order. Not the fastest line in the world, but not a problem. This was not intended to be a fast food experience. As we slowly shuffled to the front of the line, the dynamics of how the place operated began to make sense. Whether by design or pure accident, the process in which you order, the dishes are cooked to order and the time to wait until a table is available for you is magically coordinated. You cannot not sit down at any available table if not occupied, but you are seated in the order by which you have ordered. Interesting? Yes, On the brink of total chaos? Completely. However, it appears to work quite well.

Blue Water Seafood Market & Grill - Three Fish Tacos

Three Fish Tacos at the Blue Water Seafood Market & Grill – San Diego, CA

All of us ordered fish tacos in addition to sharing the Fried Calamari and Onion Rings. We ordered two bottles of white wine and I also had a draft beer from the Stone Brewery Co.. Unfortunately for my tastes, the Stone India Pale Ale was too hopped. I am not the biggest fan of fried food, so I was not overly impressed with the Onion Rings, but the Fried Calamari was perfect. Instead of rings of squid, they fried lightly breaded, well seasoned thick strips of squid that were tender and very flavorful.

The plates of fish tacos were brought to the table and then for the most part, all talking ceased. I believe I ordered the Hawaiian Wahoo, Alaskan Halibut and one other fish, but I cannot exactly remember. What I do remember is that I honestly could not tell which taco had which fish. This is not necessarily a bad thing, for they were all good and well topped with fixings, but with all of the fixings, I could not differentiate, nor could I taste the Chipolte seasoning.

I enjoyed having dinner at the restaurant and was more then satisfied with the meal. Between the shared appetizers and the three tacos I was filled with food. If I go back, I will probably have two fish tacos and share the Fried Calamari appetizer. Would I go back? On my own, probably not. If I was with someone who wanted to experience fish tacos or to eat the food at a place that was visited by Guy Fieri, then I would go without hesitation.