A Spicy Hatch Chile Pepper Relish

Relishes and chutneys seem to be all but forgotten in the modern kitchen. With the abundance of fruit and vegetables available all year round, there really isn’t the same need to preserve the harvest as it was in previous generations. This year because because of writing the blog, I have been more aware of what is in season and how cheap it is when it is, that I have began to wonder how I can take advantage of some of the bargains. Given the amount of Hatch Chiles there have been recently in the shops, I thought that a spicy chile pepper relish would be a great way to help extend the taste of the Hatch Peppers beyond the current season.

Hot Hatch Chile Pepper Relish

Hot Hatch Chile Pepper Relish

Since being in the US, I haven’t come across many relishes other than the occasional corn or green tomato relish, and though their popularity is diminishing in the UK, it is still very easy to get a hold of things such as Ploughman’s Relish, Piccalilli as well as many other things that are described as relishes, pickles or chutneys, with names being used interchangeably. Relishes, pickles and chutneys tend to be used as condiments along with a meal, rather than an ingredient in cooking, though there are many exceptions such as Coronation Chicken which uses mango chutney. Relishes tend to have big, bold flavours and go particularly well with meats, cheeses, sandwiches, barbecue food, etc.

Making your own relishes is pretty easy. Basically all you need is some vegetables, or maybe fruit, onions, sugar, salt and vinegar. If you know there are some vegetables in the refrigerator that need to be used up, but you don’t have a use for them or if something is on special offer in the supermarket, then these would be perfect candidates for making relishes. You can use the basic recipe and technique below for making different types of relishes, by substituting the Hatch Chiles and tomatoes with other vegetables and possibly adding spices.

Hatch Relish Ingredients

Hatch Relish Ingredients

Hot Hatch Chile Pepper Relish Recipe

This recipe makes approx 1 jar. To make more, just increase the quantities accordingly.

Ingredients

  • 10 hot roasted Hatch Chiles, peeled, stems and seeds removed, and chopped
  • 1 large onion, chopped
  • 3 tomatoes, chopped
  • Pickling Vinegar
  • 1/3 cup (80g) granulated sugar
  • 1 tsp of salt

Method

  1. Add the vegetables to a pan and just cover with vinegar.

    Vegetables just covered with vinegar

    Vegetables just covered with vinegar

  2. Bring the liquid to a boil, then reduce to a gentle simmer until the liquid has nearly evaporated. Be careful not to allow the mixture to burn.
  3. Add the salt and sugar, then heat until the pickle has thickened and has just become syrupy.
  4. Decant the pickle into sterilized jars and seal. It should keep for at least 6 months.
  5. Leave for a day or so for the flavour to mellow and enjoy with cheeses, meats, salads, sandwiches, etc. The flavour of the pickle should be hot, spicy, sweet, salty and acidic all at the same time.
Hot Hatch Chile Pepper Relish with Barbecued Flank Steak

Hot Hatch Chile Pepper Relish with Barbecued Flank Steak


Easy Fresh Grated Hard Italian Cheese At Home

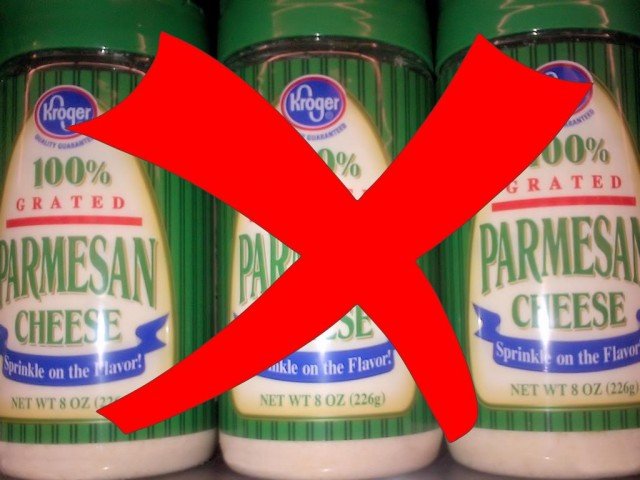
Grated Italian Cheese has come a long way from when there were very few if any options available for purchase in your typical grocery store. Most of us remember the green cardboard tube of Grated Parmesan Cheese that had a shelf life of a couple of years and lasted longer in the refrigerator after being open than that jar of hotdog relish. It lasted a long time for several reasons. The first reason is that the flavor imparted by the grated cheese was so light that no matter how much you sprinkled on your pasta you still did not taste the cheese, therefore it was not used. The second and third reason is that the “grated cheese” you were using was mixed with small amounts of cellulose powder (to prevent caking) and potassium sorbate (to maintain freshness).

Canned Parmesan Cheese

Parmesan Cheese in a Can

Thankfully the options available to most of us have expanded well beyond the green cardboard tube. You can now purchase both grated and shredded; Parmesan, Romano or Asiago and for the most part the options are either bagged or sealed in containers that are kept in the refrigerated section of the grocery store with fancy sounding Italian brand names. These are a definite improvement, but still not the best option available.

Bagged Shredded Parmesan Cheese

Shredded Parmesan Cheese in a Bag

For those that truly want to experience the true pleasure of that salty sharpness that fresh grated Italian cheese brings to a meal there is another option.The old way and infinitely more difficult way was to hand grate the hard cheese and somewhere along the way some knuckle skin would find its way onto your dish of pasta. I do not remember where or when I first tried the idea, but now to make fresh grated hard Italian cheese I use a small handheld mixer utilizing the small food processor blade attachment / container.

Step 1: Purchase a small wedge of hard Italian cheese and cut it into small chunks. I usually keep one or two wedges of cheese in the refrigerator. They last for a very long time and nothing worse than not have grated Italian cheese in the house when you need it.

Small Chunks of Romano Cheese

Romano Cheese Cut into Small Chunks

Step 2: Place a small handful into the handheld food processor.

Handheld Food Processor with Chunks of Romano Cheese

Chunks of Romano Cheese in Handheld Food Processor Container

Step 4: Turn on the processor for 20 to 30 seconds. When all of the chunks of cheese have been ground to the size of a grain of sand or smaller you can stop. Every now and then a chunk of cheese will catch on a blade and jam the handheld mixer. This is common and usually happens because you placed too much cheese in the container to be ground. It will require three to four batches to process a small wedge of hard cheese.

Freshly Grated Romano Cheese

Freshly Grated Pecorino Romano Cheese

Step 5: Pour the contents into an air tight container and store in the refrigerator until needed. In order to maintain the best freshness, only grind the amount of cheese you need for that week. Wrap the remaining chunk of cheese in Saran wrap and store in the refrigerator.

Locatelli Pecorino Romano Cheese Fresh Grated

Fresh Grated Locatelli Pecorino Romano Cheese

You can always purchase a handheld hard cheese grater for the ultimate freshness in grated Italian cheese, but to me that is just one more piece of equipment in the kitchen that has a singular use and takes up limited space. I more prefer kitchen equipment that can be used for a variety of food preparation activities.

For years when I would visit my family in Delaware, I would bring back a pound of fresh grated Locatelli hard Italian cheese that was purchased from Pappas Market in Wilmington, DE. I always thought that Locatelli was a type of hard Italian cheese that was hard to find. Little did I know that Locatelli was in fact the brand name of Pecorino Romano and not a type of cheese? Imagine my surprise when I first saw Locatelli being sold at the local HEB in Katy, TX.


Hatch Chile Partybrot – pull apart bread

It’s coming to the end of the Hatch Chile season, but there are just enough left in the shops to try some other recipes, and even when they do run out, Anaheim and Poblano Chiles are a good substitute. Partybrot is German for ‘party bread’, which is a type of pull-apart bread. ‘Party bread’ as the name suggests is a great way to serve bread at a party as it is so soft, that it is easy just to rip off a ball of bread. I’ve made these in the past and thought it would be good with some chopped roasted hatch chiles added to the dough.

I made this bread with Hot Hatch Chiles, since bread and the added cheese, would help cool down the chiles. However you could easily using milder chiles instead, but the flavour might get lost. You could also use other flavourings instead of chile for this type of bread such as crushed garlic, cinnamon or even cheese mixed into the dough.

Ingredients

  • 4 cups (500g) of strong white bread flour
  • 1.25 cups (295ml) of warm water
  • 2 tbsp sugar
  • 2 tsp salt
  • 3 tbsp of olive oil
  • 2 tsp rapid-rise active yeast
  • 6 roasted Hatch Chiles (Hot), chopped and patted dry
  • Some grated cheese

Method

  1. Mix together the flour, water, sugar, salt, oil and the yeast to form a dough. Knead the dough for about 5 mins, cover and leave somewhere warm for an hour to double in size.
  2. Punch down the dough and knead the dough for about a minute, while also adding the chiles.
  3. Cover the dough and allow to rise for another hour. Prepare a cake-tin(s) with oil and/or parchment paper.
  4. Remove the dough to a well floured work-surface. Divide the dough into about 18 equal sized pieces.

    Hatch Chile Dough

    Hatch Chile Dough

  5. Using floured hands, form the dough into a smooth ball, by tucking it in on itself underneath. Place the dough ball in the cake pan on the edge. Repeat the process until the cake pan is full. There should be enough dough for a couple of cake pans.

    Cake tin filled with dough balls

    Cake tin filled with dough balls

  6. Allow the dough balls to rise for another hour.
  7. Bake the bread in a 385F (195C) oven for 30 minutes. Don’t be tempted to bake this bread for too long as it should be soft and easy to pull apart. 10 minutes before the end of baking, sprinkle on some cheese on top of the bread. Remove from the oven and allow the bread to cool before removing from the cake pans.

    Hatch Chile Partybrot

    Hatch Chile Partybrot

Pasta Fazool….”That’s Amore”

Call it what you will; Pasta Fazool, Pasta Fazoola, Pasta e Fagiolo, Pasta Fagioli, but the Italian soup immortalized in the Dean Martin song “That’s Amore” with the lyrics “When the stars makes you drool, just-a like pasta fazool, that’s amore” is a simple to make and an extremely flavorful Italian peasant soup of pasta and beans.

My first memory of Pasta Fazool was a winter afternoon when I was a child doing my homework on a Sunday afternoon at the kitchen table. Mom served me a bowl of Pasta Fazool and I was hooked. The soup is simple, yet is so flavorful and my mother’s version is so light hat it is difficult to stop at one bowl. I am willing the wager that in every Italian Kitchen whether in Italy or the United States, whether at home or in a restaurant, there is a different version of this soup. The soup can be thin or hearty, with or without tomatoes, meat broth or vegetable, it really does not matter. The pasta and bean soup is just a simple, easy to make Italian peasant recipe that is the perfect dish any time of the year.

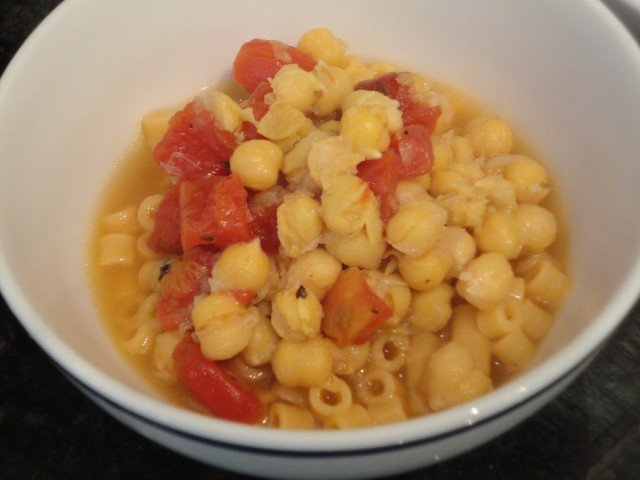
Pasta Fazool

Homemade Pasta Fazool

Not only is the soup simple to make, but the preparation is quick and can be made with ingredients that are typically stocked in most kitchen pantries. One of the things that make this soup perfect is the ratio (2-1-1-1) of ingredients that are easy to remember and can easily scaled up or down depending on the number of meals / people that you are intending to serve.

Ingredients for Pasta Fazool

Ingredients for Pasta Fazool

Ingredients (4 Servings):

  • 2 Cans Chicken Broth
  • 1 Can Diced Tomatoes (Drained – save the drained juice for later use in a stock or sauce)
  • 1 Can Garbanzo / Chick Peas (Drained), you can use any type of bean, but Cannellini is the most typically used, but for mom’s recipe, Chick Peas are used
  • 3 – 4 Whole Peeled Garlic (personal preference and dependent upon size)
  • 1 Cup of Dry Small Pasta (Ditalini or Elbow Macaroni)
  • Olive Oil, Salt (I prefer to use Sea Salt), Dried Basil, 1 Chicken & Tomato Bouillon Cube (used when cooking the pasta, but completely optional), Grated Parmesan Cheese

Preparation (30 minutes):

Step 1: In a pot drizzle some olive oil and add a couple pinches of salt and heat on Medium-High. Once the olive oil is hot add the peeled garlic cloves and sauté until they are golden brown.

Step 2: Add the chicken broth and bring to a boil.

Step 3: Reduce the heat to Medium-Low and add the drained diced Tomatoes, drained Chick Peas and a dash or two of dried Basil. Gently stir all of the ingredients and allow the soup to simmer.

Step 4: Once the soup is simmering, you can cook the pasta in a separate pot.

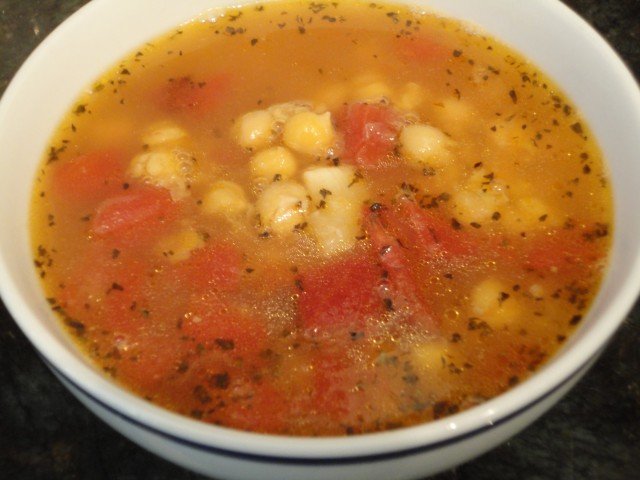
Pasta Fazool Ready To Eat

Homemade Pasta Fazool in a Pot

Step 5: Boil 3 cups of water with a bouillon cube, then add 1 cup of pasta. Cook for 10 – 12 minutes until there is very little water remaining, stirring every few minutes. Do not drain the remaining water

Cooked Seasoned Ditalini

Boiled Ditalini Seasoned With A Chicken & Tomato Bouillon Cube

Building the Soup (less than 30 minutes from when you started preparing):

Once the pasta has been cooked and the soup has simmered, I like to build my Pasta Fazool the following way in the soup bowl.

With a ladle, add one ladle of cooked pasta to the bottom of the bowl.

Boiled Ditalini in a Bowl

Building a Bowl of Pasta Fazool – Step 1: Add Cooked Ditalini

Then add a ladle portion of the diced tomatoes, chick peas and if you are lucky a whole garlic that has been cooked to soft sweet perfection.

Diced Tomatoes and Chick Peas in a Bowl

Building a Bowl of Pasta Fazool – Step 2: Add Diced Tomatoes and Chick Peas

Then add a little over a ladle of soup broth to the bowl and garnish with Parmesan cheese.

Homemade Pasta Fazool in a Soup Bowl

Building a Bowl of Pasta Fazool – Step 3: Adding the Soup Broth

Pasta Fazool is one of those recipes where I enjoy it as much for its simplicity, easiness to prepare and the perfect combination of flavors. This soup is great to eat any time of the year; but it is particularly it is very good after being outside in the cold weather. If there are any leftovers, you can either combine the soup and the pasta together and reheat in the microwave, or bring the ingredients together after they have been separately reheated.


My best pizza dough recipe

Pizza is so ubiquitous that many different options can be found in every supermarket throughout the world, and there is usually a couple of take-out choices nearby every neighbourhood, so why would you go to the effort of making your own pizza dough? For me part of it is the knowing what the ingredients are and where they have come from, but mostly it is the challenge to create something better than the ‘bog standard pizza’ with the best pizza dough and the best pizza sauce.

Most of our experiences with pizza, are usually from restaurants, take-outs or per-made ones, and anyone who has made their own pizza at home will probably have found it lacking in some way and give up on the experience, given that there are pretty cheap to buy and the effort involved in making your own. There are a few of reasons why home-made pizzas never tastes quite as good as the ones you can buy, and it comes down to flour improvers, flavour enhancers, fat, salt, sugar and the heat of the oven. Manufacturers know how to trick our taste buds to crave fat, salt and sugar, so to to make a good pizza at home we need to come up with ways to add taste and to ways to cope with home ovens.

Deep Crust Pizza

Deep Crust Pizza

My favourite pizza to eat out is Napoli style pizza, however to make this style of pizza base at home, you really need a super hot oven to get the thin, bubbly crust. You can come close with a pizza stone, but it does make things a bit more tricky. So the pizza I make most often at home, is a deep crust pizza, loaded with lots of toppings.To boost the flavour of the dough I had some ground onion and garlic powder and I sprinkle some cornmeal around the edge of the crust to help add some crunch to it.

My best pizza dough recipe

You can use a bread machine to start this dough, or do it by hand. If you are using a bread machine for making your pizza dough, then follow the manufacturers instructions as to the order you add the liquid and dry ingredients, and use the dough setting.

Ingredients

  • 0.75 cups (180ml) of warm water
  • 2 cups (220g) of strong white bread flour
  • 1 tsp of active dry yeast
  • 1 tsp salt
  • 1 tbsp olive oil
  • 1 tsp granulated sugar
  • 0.5 tsp onion powder
  • 0.5 tsp garlic powder
  • some cornmeal (polenta) or for dusting

Method

  1. Add all of the ingredients to a large mixing bowl, except the cornmeal and knead the dough for about 5 minutes. The dough should be smooth, silky and uniform.

    My best pizza dough

    My best pizza dough

  2. Cover the dough and leave it somewhere warm to double in size for about a couple of hours.
  3. Uncover the dough, punch it down and kneed again for about a minute.
  4. Cover the dough and let it rise again for another hour.
  5. Prepare a large metal baking sheet with a little oil. Remove the dough from the bowl and with floured hands, stretch and pull the dough into the shape you want, or gently roll it into shape with a rolling pin. I tend to make a large square pizza to maximise the baking sheet.

    Pizza dough pulled into shape

    Pizza dough pulled into shape

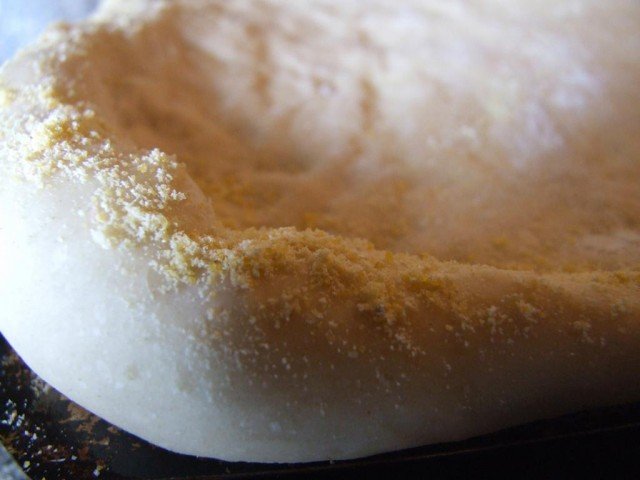
  6. Around the edge of the pizza, pinch the edges to make the crust, and then sprinkle on some cornmeal around the edge.

    Cornmeal sprinkled around the edge of the pizza dough

    Cornmeal sprinkled around the edge of the pizza dough

  7. Add your pizza sauce, toppings and cheese. Sprinkle on a little paprika on top of the cheese to help it brown and cook it in a pre-heated 375F (190C) oven for about 20 to 25 minutes until the cheese has browned.
  8. Slice the pizza and serve. And if on the slight chance there is any left, it is great cold for breakfast.