American brewers now influencing British Beer

The New Beer Frontier (BBC Food Programme) explores how the modern American Craft Brewing industry is now influencing how British brewers are approaching beer. Dan Saladino explores the beginnings of the American beer industry, which was heavily influenced by British beers, and was then  subsequently replaced in the 1850s by German and Czech beer styles from new immigrants. German beers lost their popularity after the First World War and because of prohibition during the 1920s, many European beer traditions were lost forever.

Lager beer became the standard fare in the US after prohibition due to modern industrial techniques and refrigeration made it more economical to produce than other styles of beer. It wasn’t until 1979, when home brewing was again made legal again, and the deregulation of the airline industry in 1981, meant that Americans could travel around the world cheaply again, that the modern American beer industry took off. Since the US hasn’t had a long tradition of beer making, they are ‘free-er’ to experiment with techniques and ingredients, such as heavy hopping which is now influencing beer makers around the world.

The New Beer Frontier – http://downloads.bbc.co.uk/podcasts/radio4/foodprog/foodprog_20120423-1600a.mp3

Thai Curry in a Hurry

As I think I’ve said before, I love hot and spicy food, which is strange because growing up in Scotland I never experienced anything hotter than black pepper until I went to university. Once you start to develop a taste for chilli heat, it becomes addictive. Sometimes all I want is the hottest thing on the menu such as a Indian Vindaloo or Phall, but I have to say that Thai curries (Thai Hot) have been some of the hottest I have ever eaten. There is nothing better than the aromatic waft of the herbs and spices, followed by the searing, endorphin racing heat, finished with some cooling steamed rice.

I love going out for Thai curries, but I sometimes crave the heat during the week and always keep pots of Thai curry paste in the fridge. These pots of curry paste allow me to throw together a delicious meal in minutes, without having to purchase the paste ingredients and make it myself. You can sometimes find these curry pastes in the ethnic isles of supermarkets or in Asian supermarkets. The types of Thai curry best known outside of Thailand is called ‘Kaeng’ and usually comes in three types, red, green and yellow.
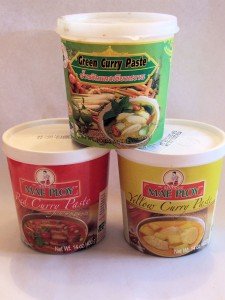
Thai Curry Pastes

Red Thai Curry (Kaeng phet) is usually made from garlic, shallots, galangal, red chillies, shrimp paste, salt, lemongrass, kaffir lime peel, coriander seeds, coriander root, cumin seeds and and peppercorns.

Green Thai Curry (Kaeng khiao wan) is usually made from garlic, shallots, galangal, green chillies, shrimp paste, salt, kaffir lime peel, coriander seeds, cumin seeds and white peppercorns.

Yellow Thai Curry (Kaeng kari) is usually made from garlic,  salt, turmeric, fenugreek, cinnamon, ginger, cayenne pepper, mace, cumin, coriander, bay leaf and lemongrass.

Once you have these pots of curry paste, and a tin of coconut milk you can throw together a meal quickly with whatever is lying around in the fridge. Usually I use mountains of vegetables and a little meat, which is usually frozen prawns, squid or leftover meat from another meal.

Ingredients (serves 2)

  • 1 tbls Thai Curry Paste – Red, Green or Yellow
  • 1 cup  (240ml) of coconut milk
  • 0.5lbs (250g) of meat, chopped into small strips – Prawns, Squid, Chicken, Beef, Pork, etc
  • 0.25lbs (125g) of vegetables, chopped into small pieces – Carrots, peppers, bok choy, green beans, broccoli, green onions, etc

Thai Curry Ingredients


Method

In a wok or large frying pan, stir fry the curry paste in oil. Add the coconut milk and stir until the curry paste has dissolved. Add the meat and cook for a couple of minutes (less if it is already cooked). Add the vegetables and cook until they just soften. Serve by itself or with rice.

Red Curry


Healthy Fruit Leather Made In The Kitchen

Fruit Leather, Fruit Roll Ups, Fruit Rolls and Fruit Skin are just a few of the names used for fruit that has been pureed and then dried into a sheet. The difference between what is mass produced, commercially available and what can be made at home is literally the difference between night and day. This is not to say that I have not enjoyed both domestic and internationally produced fruit leather, but the process and result of what is made at home is much different than what is purchased in stores.

Strips of Peach Fruit Leather

Homemade Peach Fruit Leather

Recently I picked more fresh peaches then we could consume fresh. Aside from giving away some of the fruit, making homemade peach jam, peach liqueur, fresh peach sorbet and freezing peaches whole for future use, there still was fruit sitting in the refrigerator. I solicited the advice from my friend Karen who suggested that I experiment making fruit leather. She forwarded to me instructions from the book: Super Baby Food which I loosely followed. It appears that fruit leather has it’s origins in the Middle East, with the pronunciation in Arabic and Armenian respectively being amar addine and bastegh for dried sheets of Apricots.

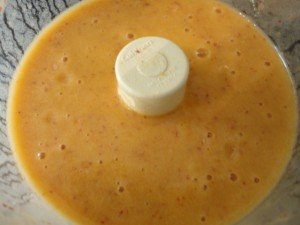
Peach Puree in Food Processor

Peach Puree in Food Processor

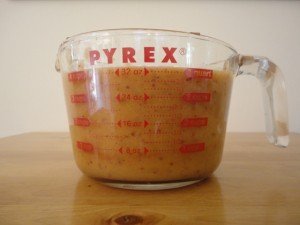
4 Cups of Peach Puree

4 Cups of Peach Puree

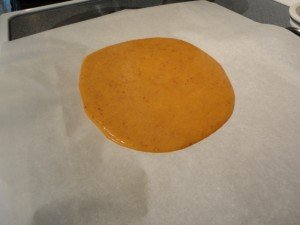
2 Cups of Peach Puree Poured on the Parchment Paper

2 Cups of Peach Puree Poured on the Parchment Paper

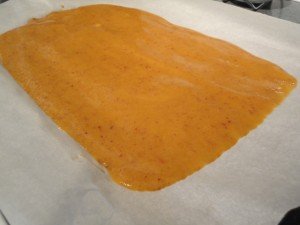
Peach Puree Spread on Parchment Paper

Peach Puree Spread on Parchment Paper

There is relatively few ingredients and equipment needed to make homemade fruit leather in the kitchen; fresh fruit, food processor / blender measuring cup, spatula, large bowl (plastic or glass), parchment paper, oven, baking sheets and if desired, honey or a simple sugar syrup. Beyond these simple requirements, the most important thing that is required is time.

  • To make one sheet of fruit leather, you will need approximately 6 Peaches (1.25 Pounds) to create 2 Cups of fruit puree. For my first attempt in making fruit leather, I doubled the recipe.
  • Wash the peaches well, remove the pit and slice / dice in manageable pieces for the food processor or blender. No need to remove the skin for it provides texture, color and fiber to the fruit leather. Add one tablespoon of lemon juice for every 2 cups of puree to prevent discoloration.
  • The puree should have the consistency of molasses or a thick applesauce. If not, then bring to a boil on medium high heat, turn off the heat and stir. I should have followed this step for the peach puree I created was too runny.
  • Pour two cups of fruit puree onto the parchment paper, spreading the mixture evenly, keeping away from the edges of the baking pan to a thickness of 1/8-1/4 inch thick. Sounds easy? Not exactly, but trust your judgment.
  • Place the baking sheet / sheets into the oven, middle racks and bake at the lowest possible temperature. My oven would go no lower than 175 degrees Fahrenheit. I kept the oven door cracked as instructed in order to lower the overall temperature in the oven. There are several techniques described on the internet for alternative ways to dry the fruit puree into fruit leather. One of these options may be more appropriate for your oven.

I allowed the peach puree to “dry” for about six hours, rotating the two trays every two hours. The time will depend on the temperature of the oven, the amount of liquid in the puree and the thickness of the puree on the parchment paper.

When the puree was no longer wet in the middle and appeared to have soft dried into a single sheet I removed the sheet of peach fruit leather from the oven. Once the fruit leather has cooled, the remove it from the parchment paper and cut it with scissors the desired length and width.

The net result of this experiment was that the first sheet was too brittle and instead of trying to salvage the center of the sheet into fruit leather strips, I ate the entire sheet. The peach flavor was pleasant; the texture despite being brittle was chewy and reminded me of the fruit roll ups I used to eat years ago. I felt no guilt for eating an entire sheet of fruit leather, for it was all natural with no additional additives. The second sheet separated from the parchment paper with no problem and I was able to cut the fruit leather into strips. The strips were then placed into an airtight container and store in the refrigerator.

Dried Peach Fruit Leather on Parchment Paper

Ready To Eat Peach Fruit Leather on Parchment Paper

In all it was a fun experiment to perform with the excess peaches. Peaches are not the only fruit that can be used to make fruit leather. With the exception of raspberries and blackberries (too many seeds), I cannot think of many other fruits that could not be made into this tasty and healthy treat. I am not sure if I would attempt this recipe again, but then I do not have children and can think of more adult themed uses for fresh picked peaches, i.e. Homemade Peach Liqueur or Peach & Mango Margaritas.


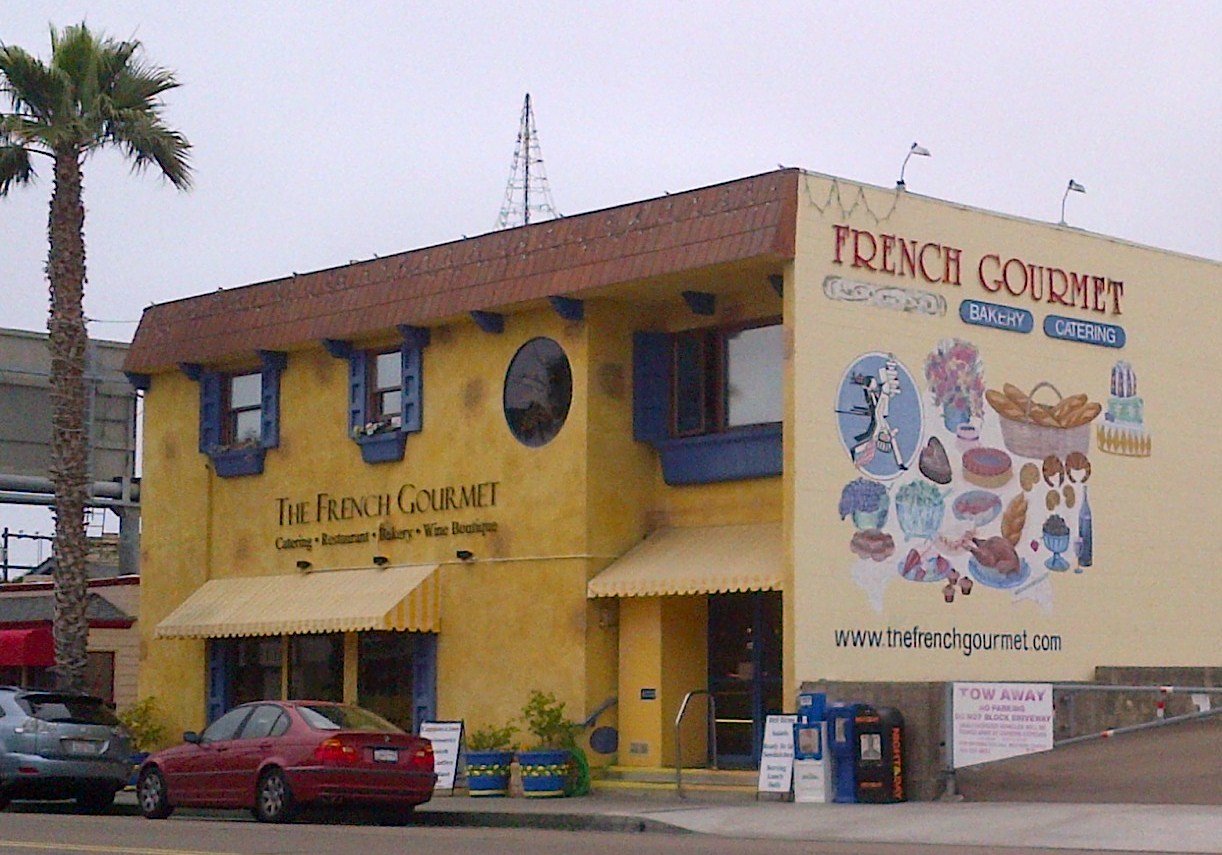
Dinner Review – The French Gourmet (San Diego, CA)

Every now and then you come upon a restaurant that is truly enjoyable, a place you would frequent regularly, but unfortunately is not in the city in which you live. The French Gourmet is that type of restaurant, located at 960 Turquoise Street • San Diego, CA 92109. We were visiting San Diego with friends recently and in searching for a nice restaurant to enjoy, The French Gourmet was well reviewed on the website Tripadvisor.

The Frech Gourmet Restaurant - San Diego, CA (Pacific Beach)

The French Gourmet Restaurant & Bakery - San Diego, CA (Pacific Beach)


I will admit, I am far from the best judge of French food and maybe even a little biased against French cuisine. My bias is based upon purely irrational reasons such I am not a food snob, I prefer meal portions that leave me satisfied and well, I am an American and therefore maybe even a little self conscious that on some level our cuisine can be lacking at times.

The French Gourmet is located on a busy street in Pacific Heights and is part Bakery / Pastry Shop and French Bistro in Pacific Beach, maybe 10 minutes from Interstate 5. Directions to the restaurant are easy and there is no possible way to get lost. If there was one detraction from the location it is that finding a parking space is a little dicey and may take a few minutes. However, if this is the only negative element to the bistro, then this is not a reason not to go for a wonderful meal.

When you first walk in, you notice the display cases of pastries, breads and prepared sandwiches. I could have stopped right there and ordered. All the of food on display looked great. You then notice to your left that there is a section for seating, possibly being able to sit 48 customers at 12 tables. The environment is cozy, intimate and in my opinion is what a bistro is meant to convey. You are not exactly sitting on top of the other tables, but nor are you so far away that you feel that they are located in another zip code.

At first, I was a little put off by the dinner menu for I really did not see anything that immediately shouted “Order Me! Order Me!”. I was hungry, but not famished. In addition to this, I typically stay away from looking at the Beef selection of entrees on a menu out of personal preference. I love Beef, but am hesitant to order Beef in any place other then a steak house. It was not until my friend mentioned that he was going to order the Foie de Veau (Sauteed Calf Liver with Onions and Demi-Glace) did I have an inkling of what I was going to eat. Only then, did I know what I was going to order. I ordered the Foie de Veau and to start the meal I would have a bowl of Soupe a l’Oignon Gratinee (French Onion Soup). After the meal was ordered, a basket of French Bread was served (perfection) and then the wine was ordered. The wine selected was a 2000 Chateau Haut-Beausejour, Saint-Estephe, Bourdeaux. I enjoy wine, but do not claim to know more then what I like. When I am introduced to a new wine, I can quickly determine whether or not I will look for this wine again. The 2000 Chateau Haut-Beausejour, Saint-Estephe, Bourdeaux was smooth and represented the difference between a good wine and a fine wine. I will be looking for this wine at Spec’s in Houston.

Fast forward to the French Onion Soup. It was excellent. Any other words used to explain the soup would probably ruin my ability to describe how really good was the soup. The entree was then served. I like liver, whether it is calf, chicken, lamb, duck or turkey. Most calf liver in the United States is served thin sliced in diners and then pan fried with caramelized onions and maybe bacon. The calf liver served at The French Gourmet was a unsliced portion of the liver that was most likely pan seared to be prior to being finished off Medium-Rare in the demi-glace. In retrospect, I should have ordered the liver Medium versus Medium-Rare, but this is not the fault of the restaurant. With the exception of the center of the liver being raw, the meat was so tender that it literally melted in the mouth. It was like eating pate, the liver was that smooth. The vegetables and the potato au gratin were perfectly done and were well paired with the liver. In short it was the perfect dish. We did not order desert, but then I was full. Who would have thought that I would have been full from eating a meal in a French Bistro?

I would not hesitate to eat this meal again and only wish that I lived closer to this restaurant or could find a restaurant like this near me on the west side of Houston.

Homemade Peach Jam, Perfection in a Mason Jar

What to do with all of the peaches that were picked last week? Before the peaches were even picked, I knew that in addition to enjoying them fresh, I would be making a batch of Peach Jam. I have been making fruit jams for the past few years and the beginning of the canning season for me in Katy, TX starts with the peaches ripening on the trees. Strawberries come into season before the peaches, but I always seem to miss the picking season for Strawberries (February) in East Texas.

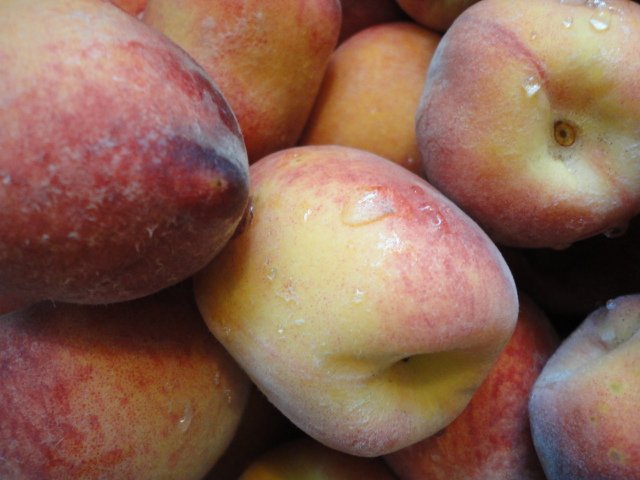
Fresh Picked Peaches

Fresh Picked East Texas Peaches

Fresh Peaches Diced and Peeled

Peeled and Diced Fresh Peaches

Peaches, Pectin, Sugar and Lemon Juice in Pot

Boiled Peach Jam in a Pot

Mason Jar with Wide Mouth Funnel

Mason Jar Being Filled with Peach Jam

Mason Jars Waiting to be Capped with a Lid

Peach Jam in Mason Jars Waiting to be Capped

Capped Mason Jars in a Pot of Boiling Water

Sealed Mason Jars Boiling in Water

Making homemade fruit jams in the kitchen is not that difficult. Simply follow the recipe and canning instructions provided on the box of Pectin or from the Ball or Sure-Jell websites and you will be successful. The steps used are not that different than what is followed on the large scale commercial effort to produce jams, jellies, preserves and marmalade. Whereas most of the activity in the kitchen is manual, the steps in a food processing plant are mostly automated. The most significant difference is in the flavor and texture. Peach jam purchased at the grocery store is not even worthy of being compared to the peach jam that is made in your kitchen. The first taste of homemade peach jam from fresh picked fruit will have you hoarding your jars of jam and shamelessly lying to your friends that you have no more peach jam to share with them.

The most important things to remember are to have the ingredients, supplies and time available.

Ingredients & Supplies (To Make One Batch):

  •  4 Cups of Peeled and Diced Fresh Peaches (3 Pounds, but I always am prepared to peel and dice more Peaches if I am short of the 4 Cups)
  • 5 ½ Cups of Sugar
  • 1 Package of Fruit Pectin
  • 2 Tablespoons of Lemon Juice
  • Canning Jars, Lids & Caps (4 x 16 Ounce Jars or 8 x 8 Ounce Jars, or some combination that equals to 64 Ounces)

Instructions:

Below are the basic steps to successfully making peach jam in the kitchen. Over the last few years, I have made nearly a dozen batches of homemade jams and still reference the instructions provided by Ball and Sure-Jell.

  1. Peel and Dice Peaches for 4 Cups
  2. Wash Jars, Lids and Caps, then Sterilize
  3. Boil the 4 Cups of Peeled and Diced Peaches
  4. Add the Pectin, Lemon Juice and Sugar as instructed on the box of Pectin
  5. Bring the entire mixture to a roiling boil
  6. Fill the jars with hot Peach Jam
  7. Wipe the rims of the jars with a damp cloth, center the Lids and secure with the Crew Caps
  8. Place the capped Jars into the boiling water bath and boil for 10 minutes (see instructions regarding elevation)
  9. Remove jars of jam from the boiling water.
  10. Within a few hours most of the Lids will “pop” indicating that a proper vacuum seal has been achieved. Ball and Sure-Jell provide additional instructions on what to do if the Lids do not seal correctly or the fruit has not properly set. Of all of the different fruit jams that I have made, Peach gives me the most problems with firmly setting, but I no longer reprocess unless it runs like syrup or water.

Once the Jars have popped, store the Peach Jam in a cook dark place (Pantry). They will remain good for a year. Trust me, no homemade jam has ever remained untouched that long in our house regardless of the size of the batch made. That first taste of Peach Jam will have you wondering how you were ever satisfied with store bought jam. The flavor is intense and will have you wishing that you had more peaches to process and more pantry space to store your homemade jam.

Homemade Canned Peach Jam

Homemade East Texas Peach Jam